
Table of Contents
Open shifts are essential for scheduling employees because they act as stand-ins for shifts that must be covered. This guide offers detailed instructions on efficiently viewing, creating, and managing open shifts using various techniques.
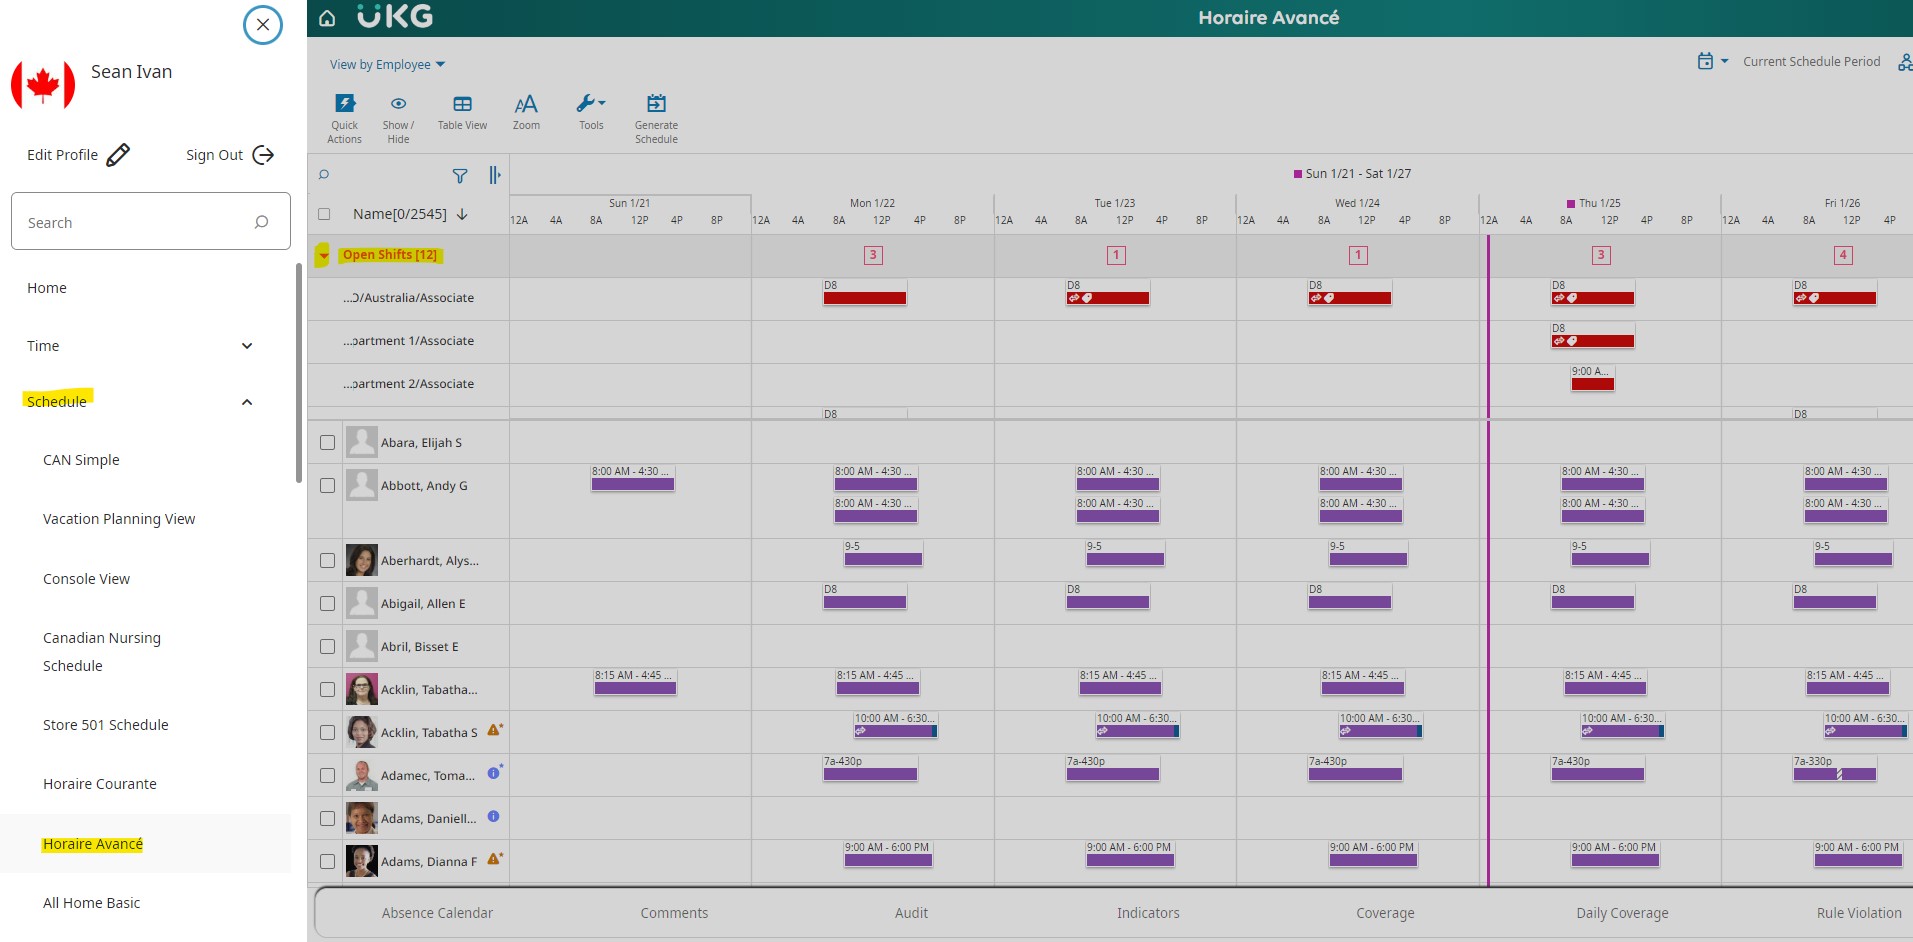
Viewing Open Shifts
- Navigate to the Schedule Planner:
- Main Menu > Schedule > Select the applicable Schedule Planner.
- Ensure Visibility of Open Shifts:
- Confirm that open shifts appear on the Schedule Planner page.
- Show Open Shifts Option:
- If necessary, enable the option to show open shifts in the schedule.
- Select Show/Hide in the toolbar.
- Check the Open Shifts box.
- Select Apply.
- If necessary, enable the option to show open shifts in the schedule.
- Total Open Shifts:
- The total number of open shifts for the viewing time period appears in the Open Shifts row.
- Expanded View:
- Expand the Open Shifts list to view and manage open shifts effectively.
- Job Representation:
- Jobs with open shifts are represented as separate rows beneath the Open Shifts header row.
- Jobs with open shifts are represented as separate rows beneath the Open Shifts header row.
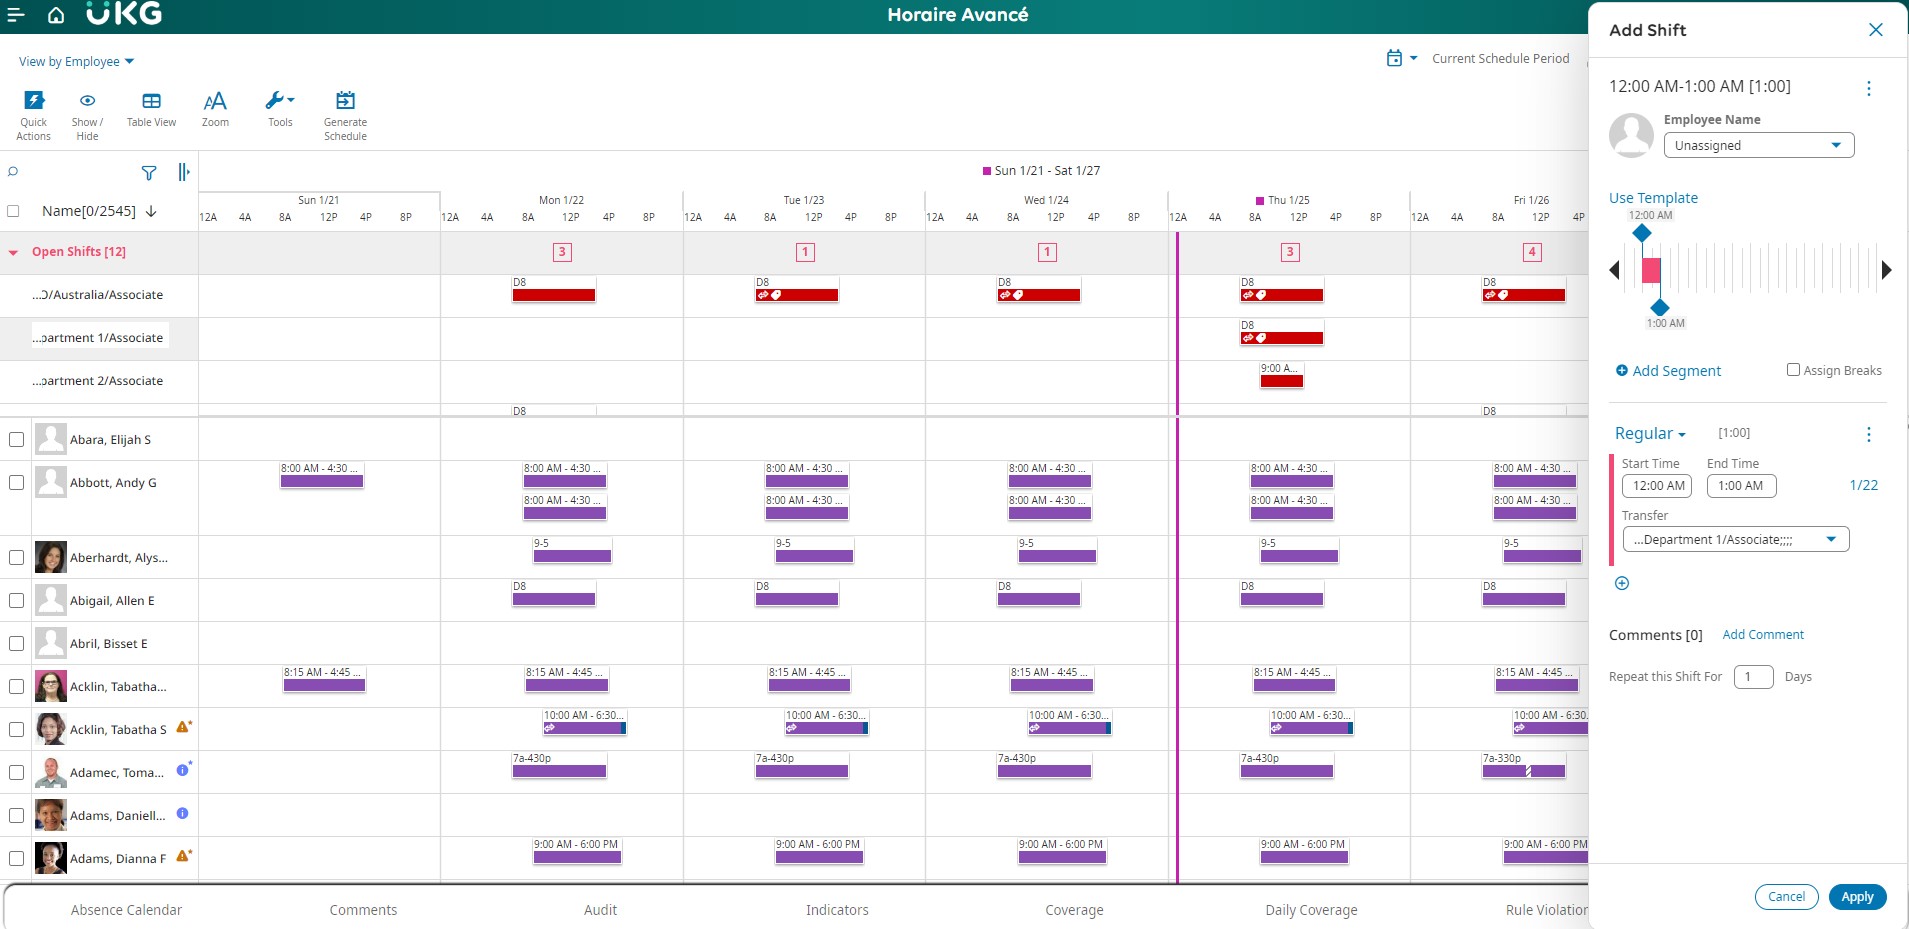
Creating Open Shifts with All Options
- Navigate to the Schedule Planner:
- Main Menu > Schedule > Select the applicable Schedule Planner.
- Expand Open Shifts:
- On the Open Shifts row, right-click a date cell in the schedule.
- Access Add Shift Slider:
- In the shift glance, select “Add Shift.”
- Confirm “Unassigned” in the Employee Name field.
- Enter Shift Details:
- Enter Start Time and End Time.
- Select Transfer to choose the transfer details.
- Add Business Structure and select the required job.
- Select Ok.
- Apply Changes:
- Click Apply and then Save to create the open shift.
- Click Apply and then Save to create the open shift.
Creating Open Shifts in Table View
- Navigate to the Schedule Planner:
- Main Menu > Schedule > Select the applicable Schedule Planner.
- Access Table View:
- Select Table View from the Schedule Planner page.
- Expand Open Shifts:
- Expand the Open Shifts area.
- Manual Entry:
- Select a cell in the job row and enter:
- The name of a shift template or
- Start and End time separated by a hyphen (e.g., 8a-4p).
- Save Changes:
- Click Save to add the open shift manually.
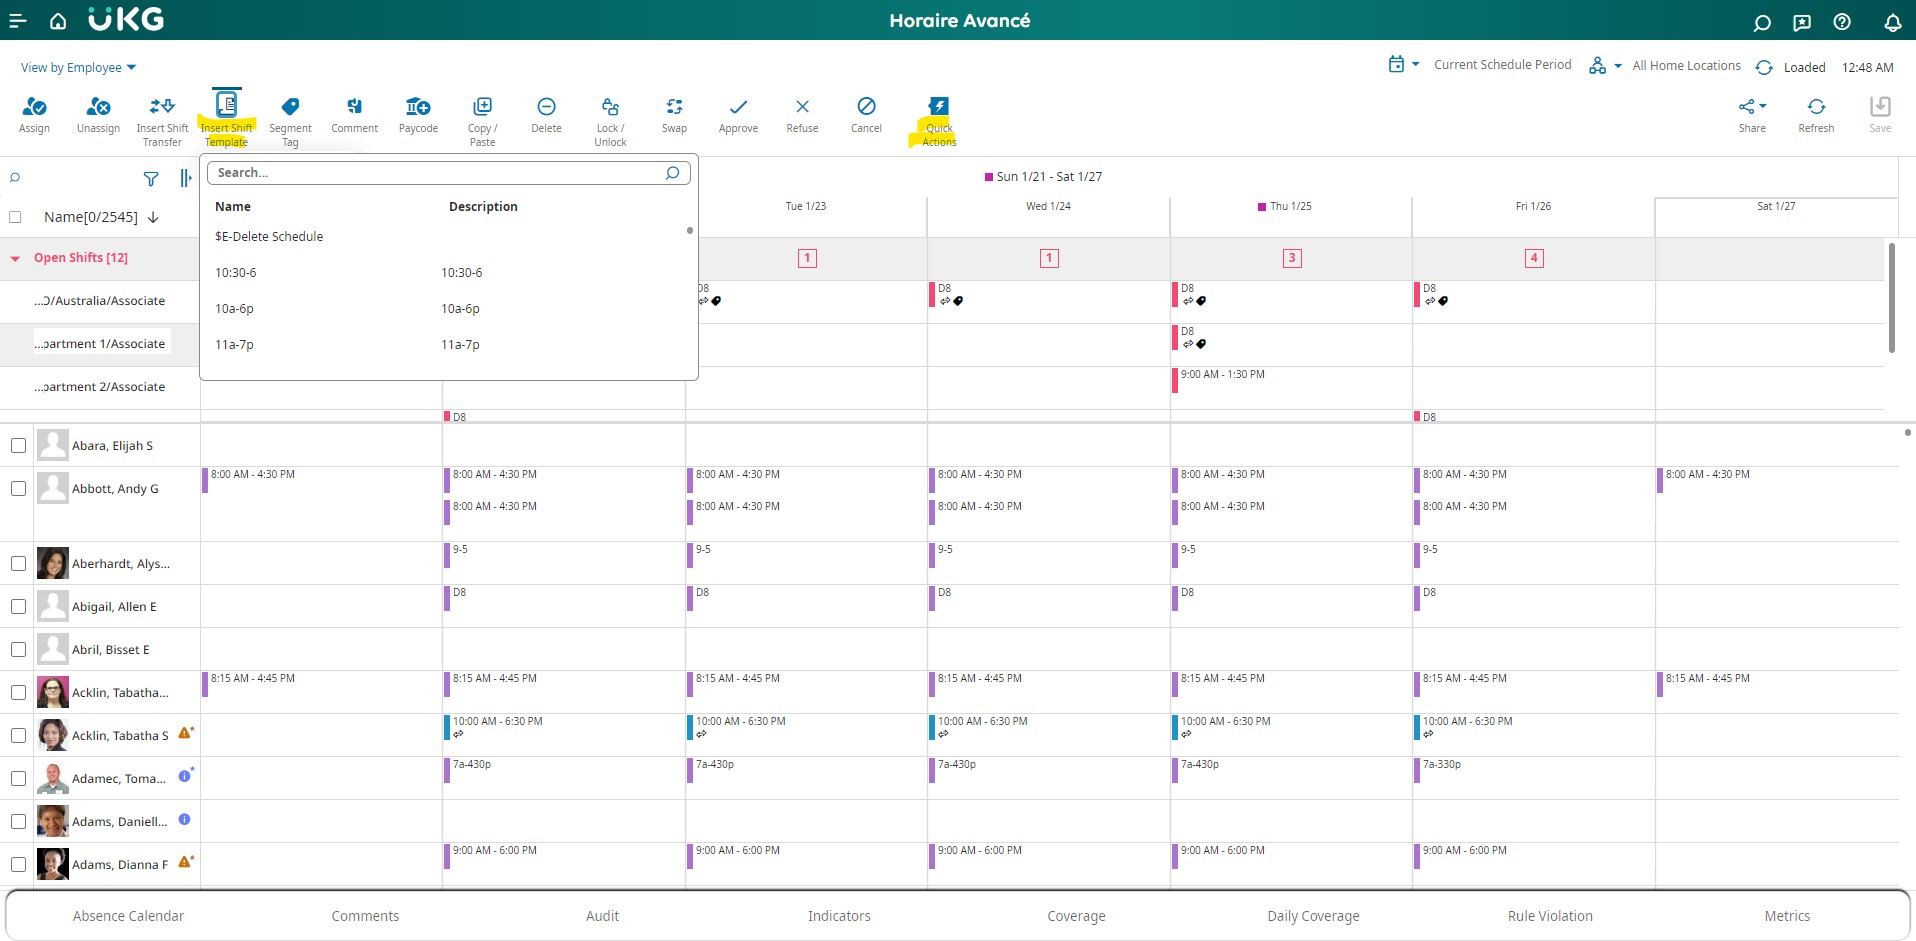
Creating Open Shifts from a Template
- Navigate to the Schedule Planner:
- Main Menu > Schedule > Select the applicable Schedule Planner.
- Expand Open Shifts:
- Expand the Open Shifts area.
- Quick Action for Shift Templates:
- Select Quick Actions.
- Choose Insert Shift Template.
- Select Template:
- Choose the applicable shift template from the list.
- Create Open Shifts:
- In the job row, select date cells to create open shifts.
- Stop Quick Actions:
- Select Quick Actions again to stop creating open shifts.
- Save Changes:
- Click Save to finalize the addition of open shifts.
 By following these detailed steps, you can efficiently manage open shifts, ensuring your schedule meets coverage needs and remains flexible to changes.
- Click Save to finalize the addition of open shifts.