Custom forms on UKG Ready serve diverse purposes within the platform, including employee onboarding, performance reviews, training tracking, time off requests, expense reimbursement, compliance documentation, surveys, and custom workflows. These forms streamline processes by allowing employees to submit and managers to review essential information efficiently. Whether it’s gathering employee data, managing performance evaluations, or ensuring compliance with regulations, custom forms provide a flexible solution tailored to the needs of each organization, enhancing HR and workforce management capabilities effectively.
To begin, access your WFR account and proceed to the HR Setup option located in the left menu under Settings. Then, choose Custom Forms.
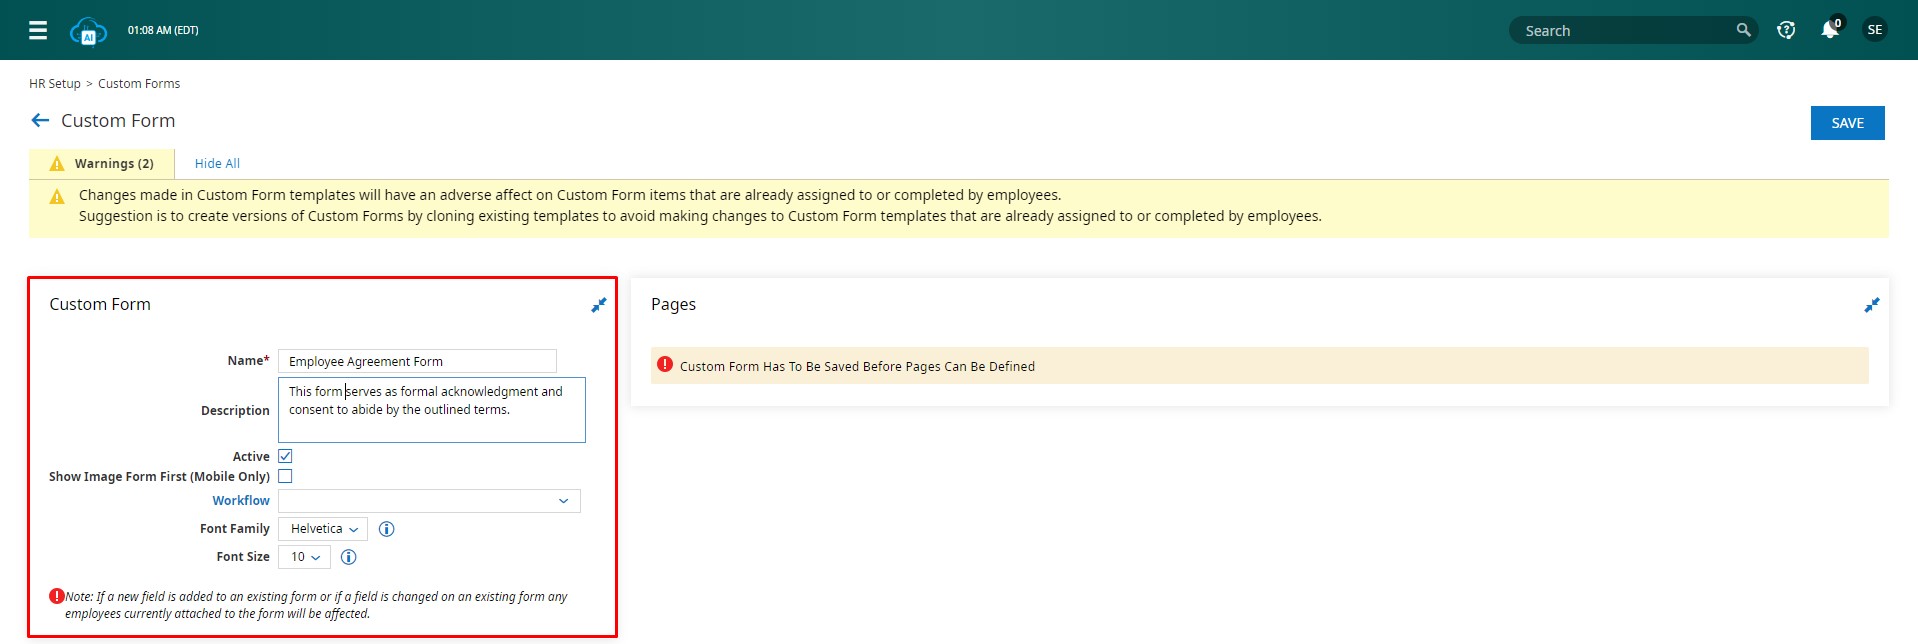
Click the “ADD NEW” button on the Custom Forms page. This will prompt a preliminary page displaying essential details about the custom form. Complete the required information and assign a name to your custom form. Once finished, click “Save” to confirm your changes.
Next, choose “ADD NEW PAGE” from the options located in the top right corner. A new page will emerge in the box on the right, displaying a page number. Click on the pencil icon to continue editing.
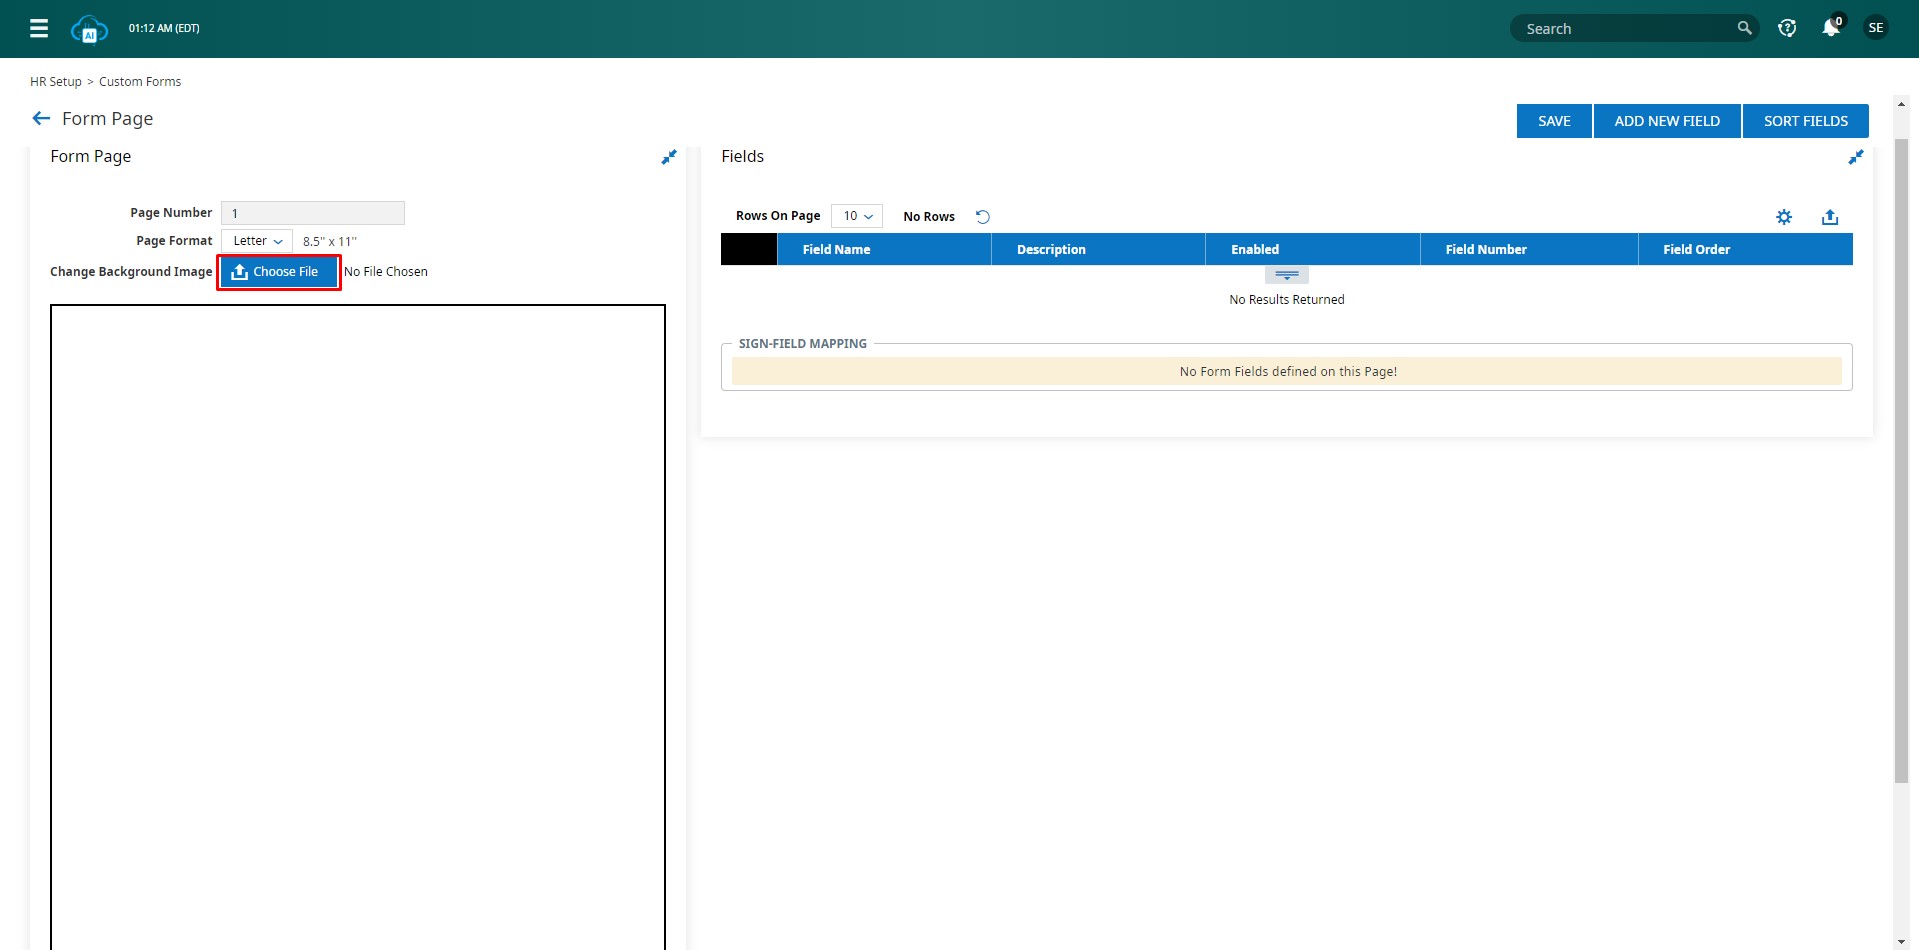
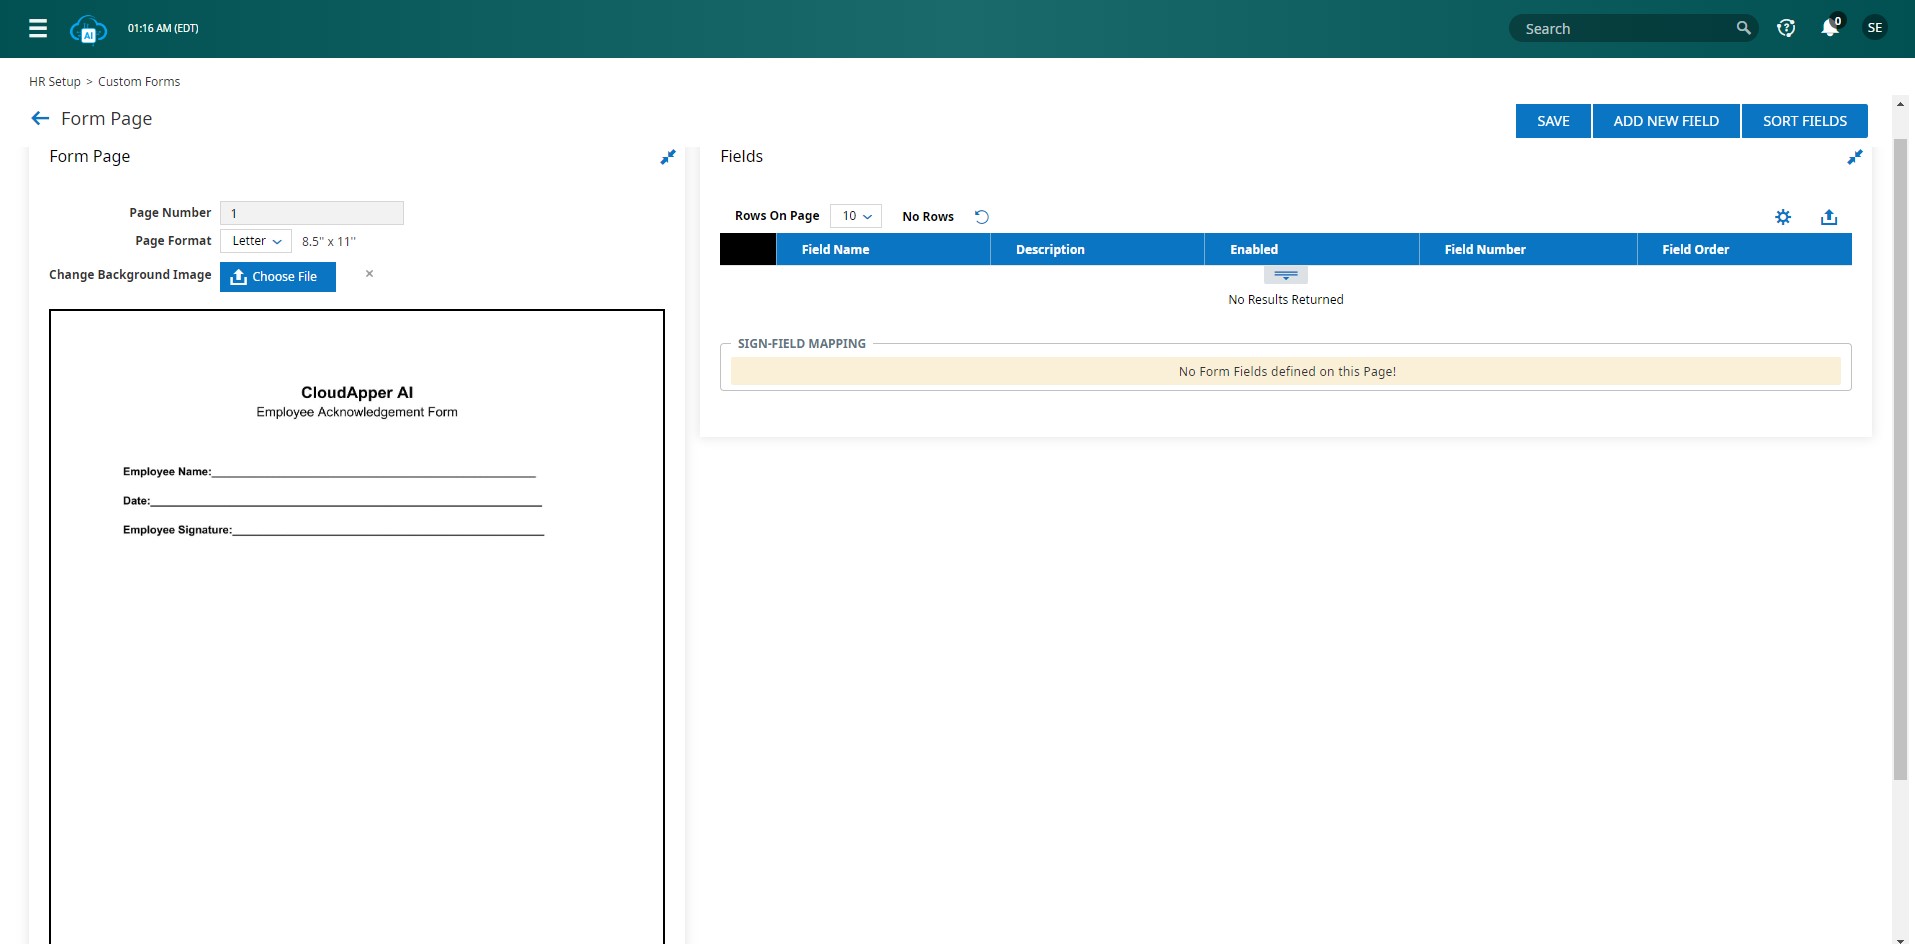
Click on “Choose File” and upload your document. Once the document is uploaded, the box on the left will display a preview of its contents. For this particular scenario, we have selected an Employee Agreement Form that necessitates an employee signature.
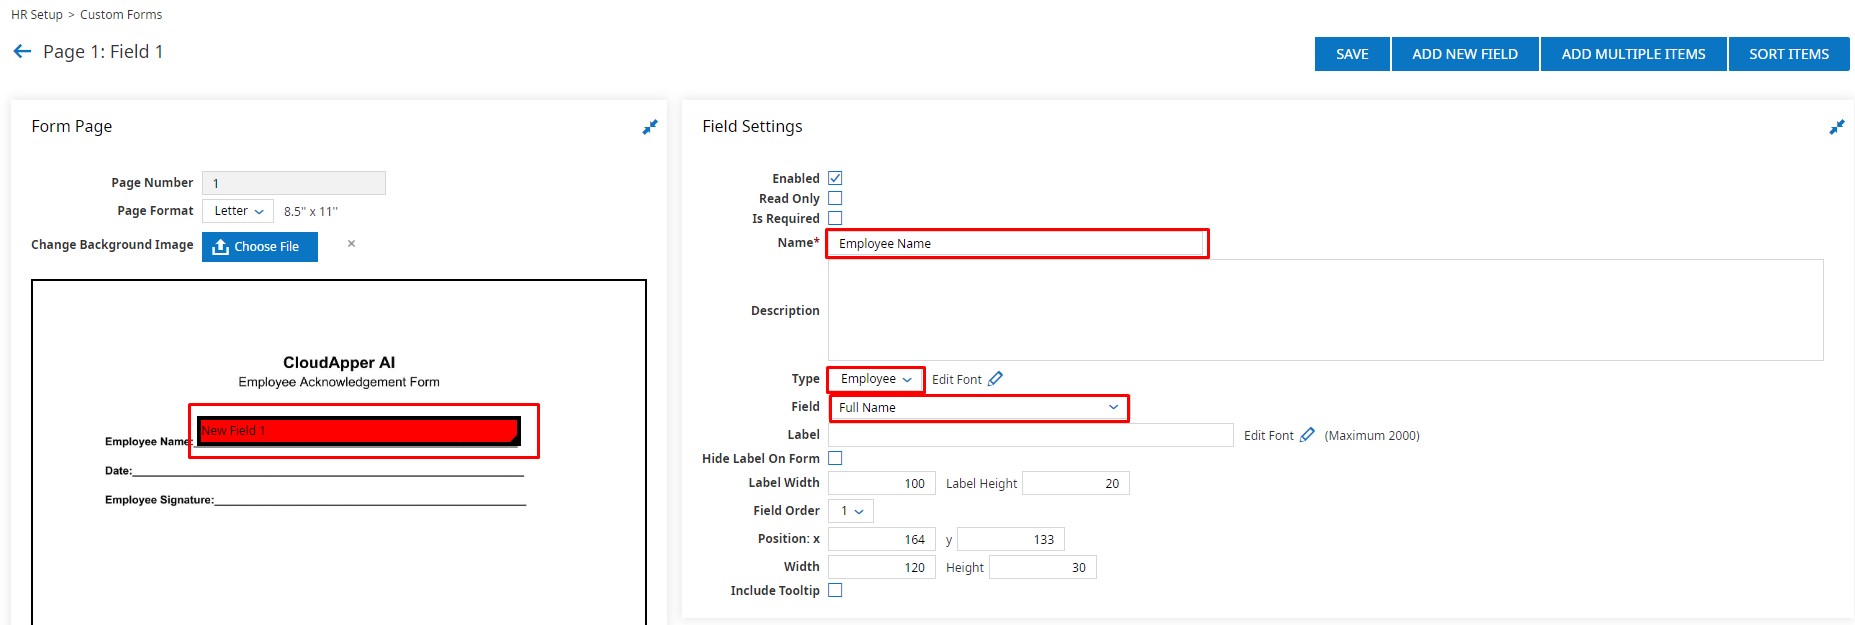
To add editable fields to the form, click on the “ADD NEW FIELD” button. This action will generate a blank field highlighted in yellow in the top left corner of your page. Then, click on the pencil icon next to the field item to proceed with editing.
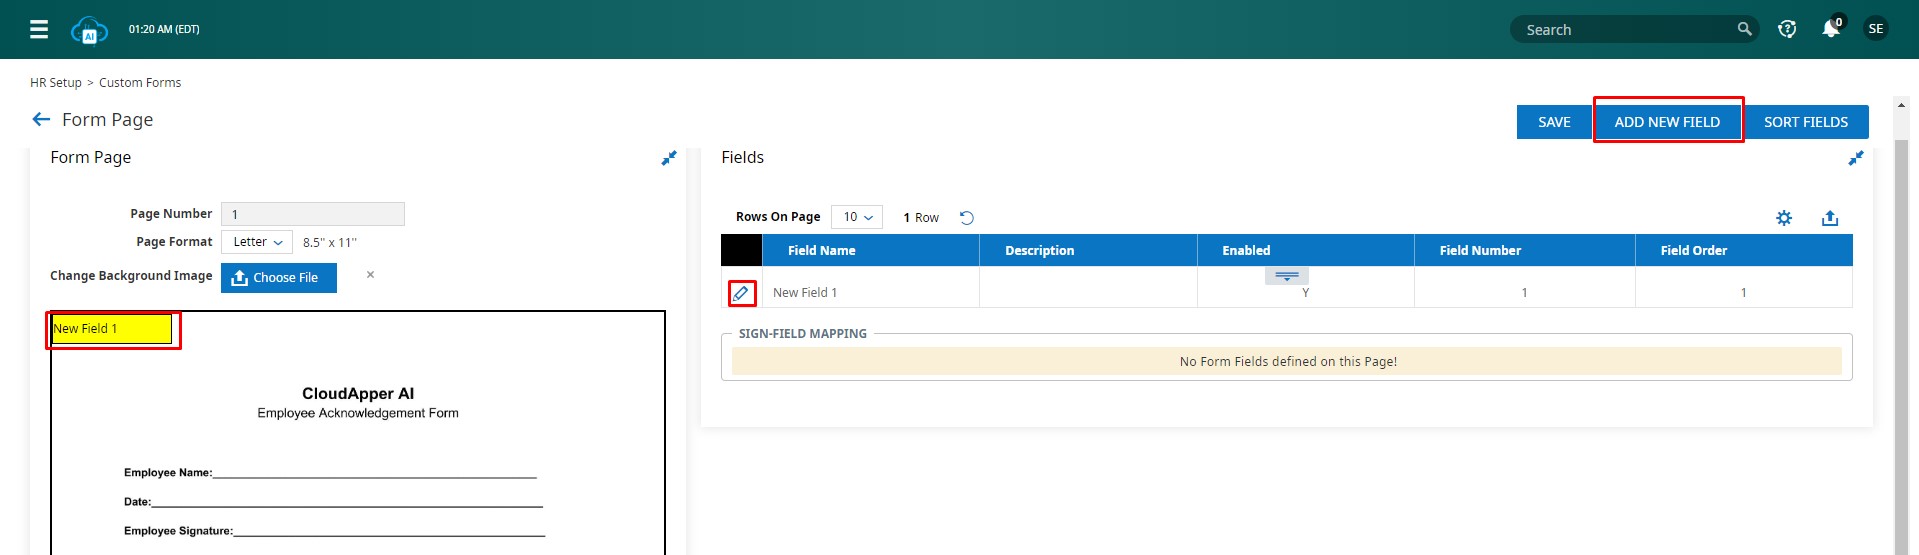
On the left side, drag and drop your field to the appropriate section of the page preview. Provide a name for your field; in this case, it’s “Employee Name“. From the “Type” dropdown, select “Employee“, and from the “Field” dropdown, choose “Full Name“, which represents the required information from the employee’s overall details. Then, click “Save“, and your field name will be updated on the page preview on the left.
Continue using the same method to add more fields to your form on the left side. Once you’ve added all the necessary fields, click “Save“, and your customs form will be successfully created.
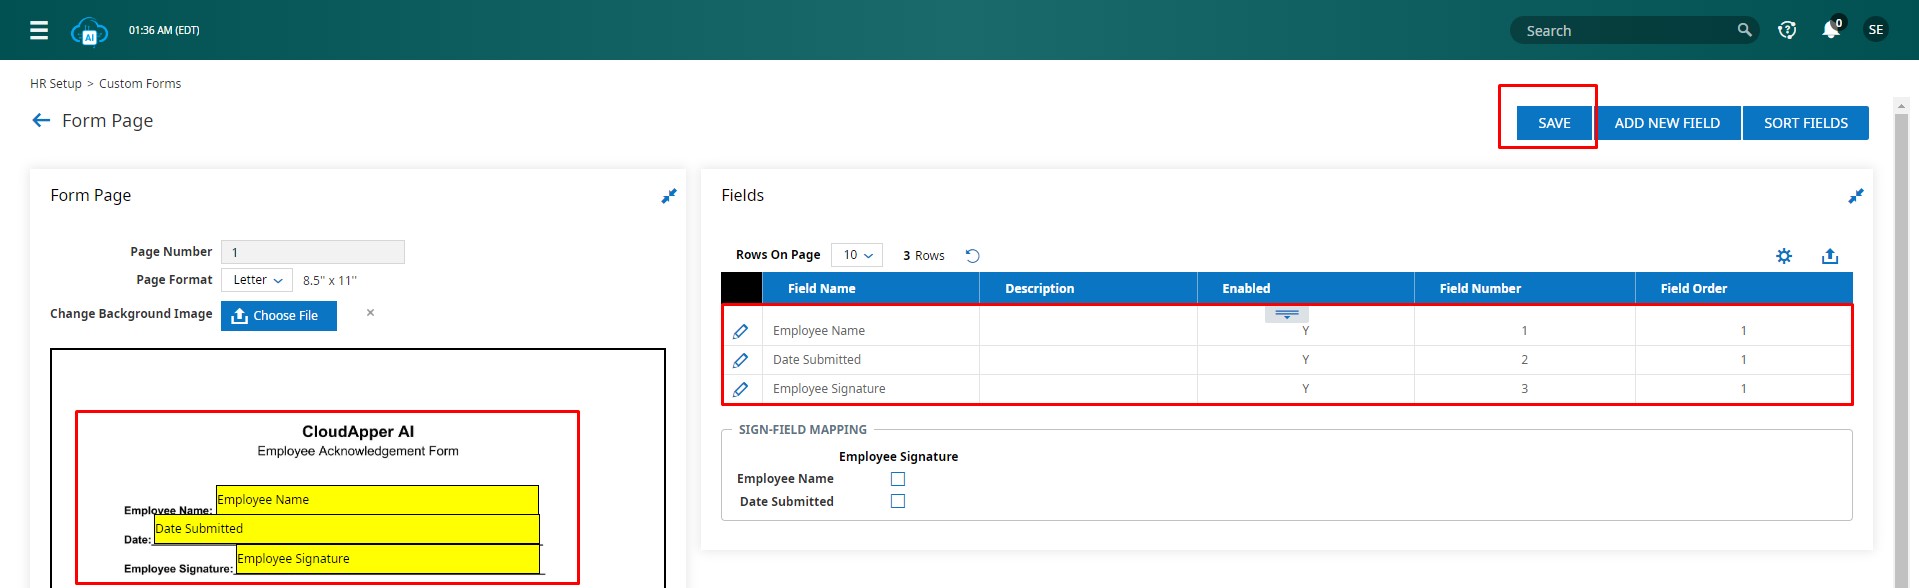
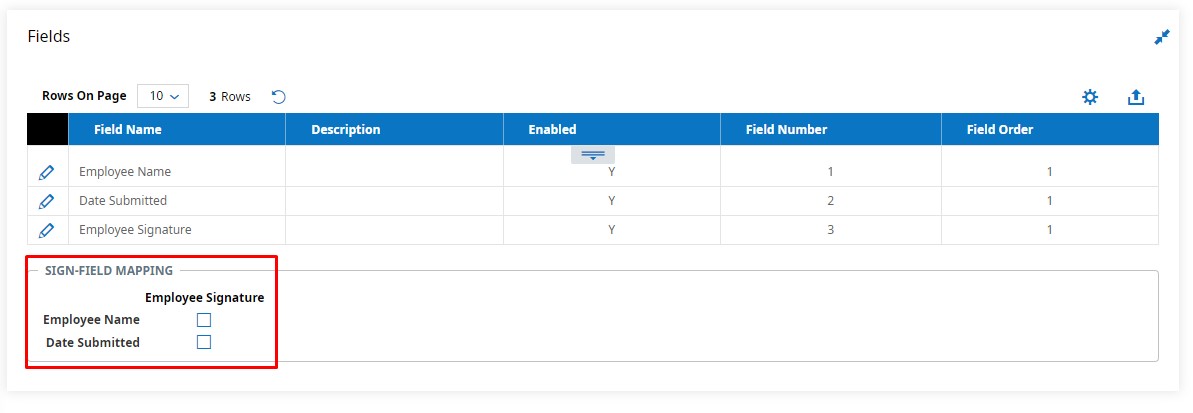
After saving the custom form, a new section will appear at the bottom right labeled “Sign Field Mapping” with checkboxes initially unchecked. Check these checkboxes and save the custom form once more. This action ensures that the signature field is appropriately mapped for signing. Now, you’ll find your new custom form available in the list.
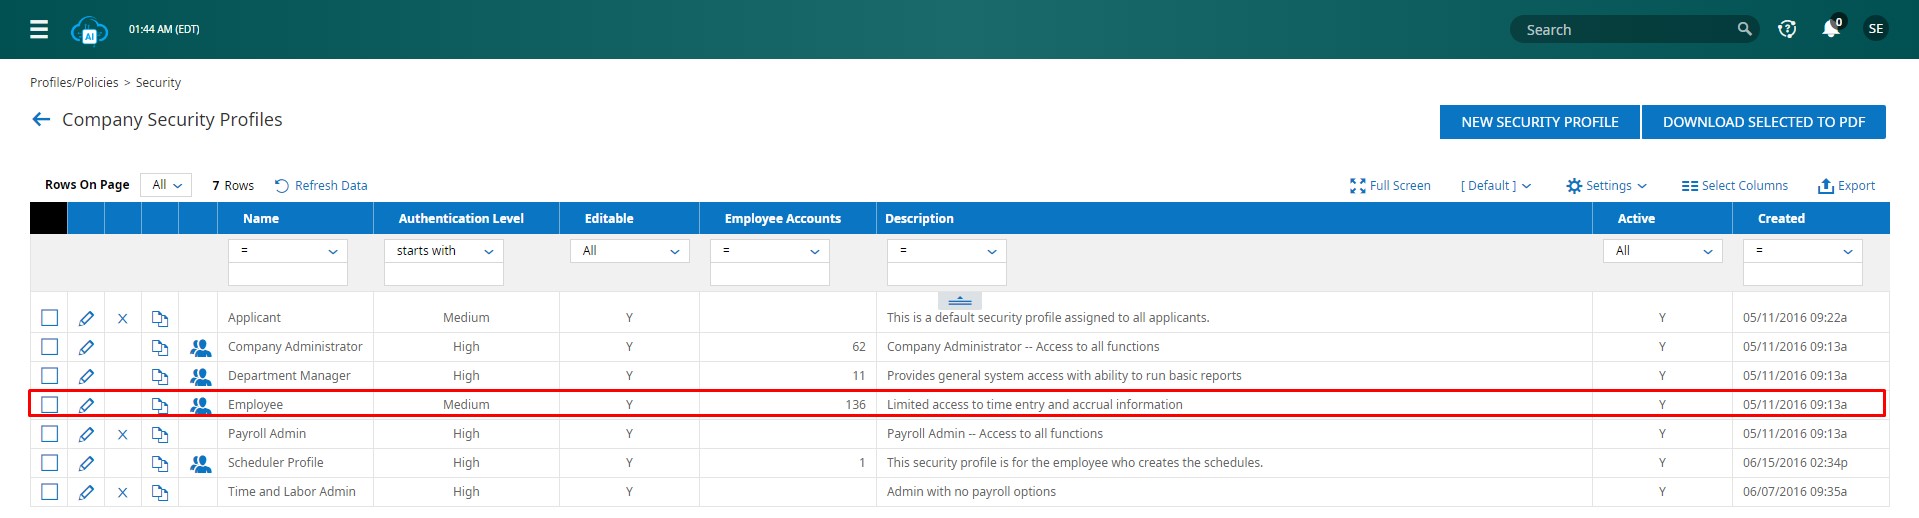
To apply security to the custom form, navigate to “Security” under Profiles/Policies in the menu bar on the left. To define employee access for this custom form, click on the pen icon next to the “Employees” security profile.
Under “MY CUSTOM FORM ITEMS” (locate this using the search box if necessary), check the required accesses from the checkboxes as depicted in the image below, then click “Save.”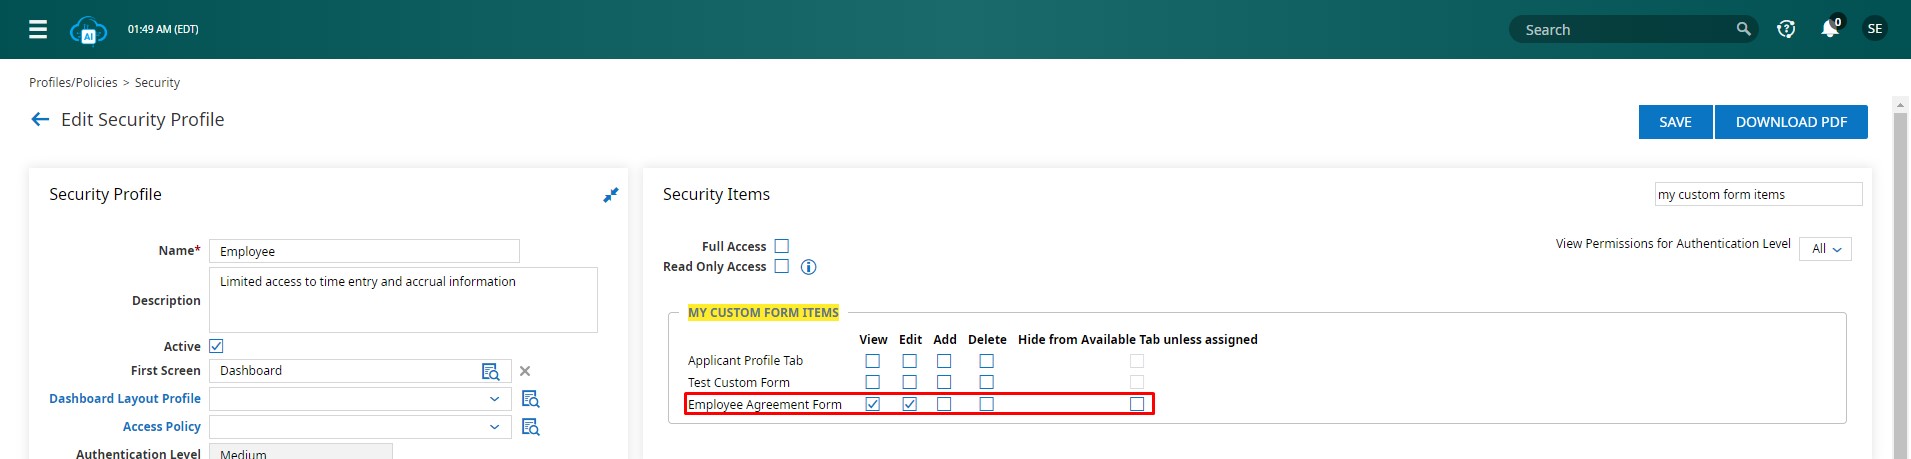
Additionally, you can apply security rules to custom forms by clicking on the pen icon next to the custom form. After successful creation, a new “Apply Security” button will appear in the top right corner. Click on this button, and a box displaying access rules as checkboxes will pop up. Check the appropriate boxes and then click “Save.”

Your employees can now view and edit the form upon being assigned to the form as a part of their onboarding.