Table of Contents
In the ever-changing field of workforce management, keeping operational effectiveness and employee satisfaction requires optimizing shift premiums. Organizations can use the tools in their administrative settings to easily create and manage shift premiums, which will streamline the process. In this guide, we’ll walk you through setting up shift premiums, regardless of whether you’re making a new rate table or adding to an already-existing one.
Adding Shift Premiums to Existing Rate Tables
Access Global Setup:
Navigate to Admin > Company Settings > Global Setup > Global List Definitions > Shift Premiums.
Create New Shift Premium:
Click on “New Shift Premium” and populate the required information.
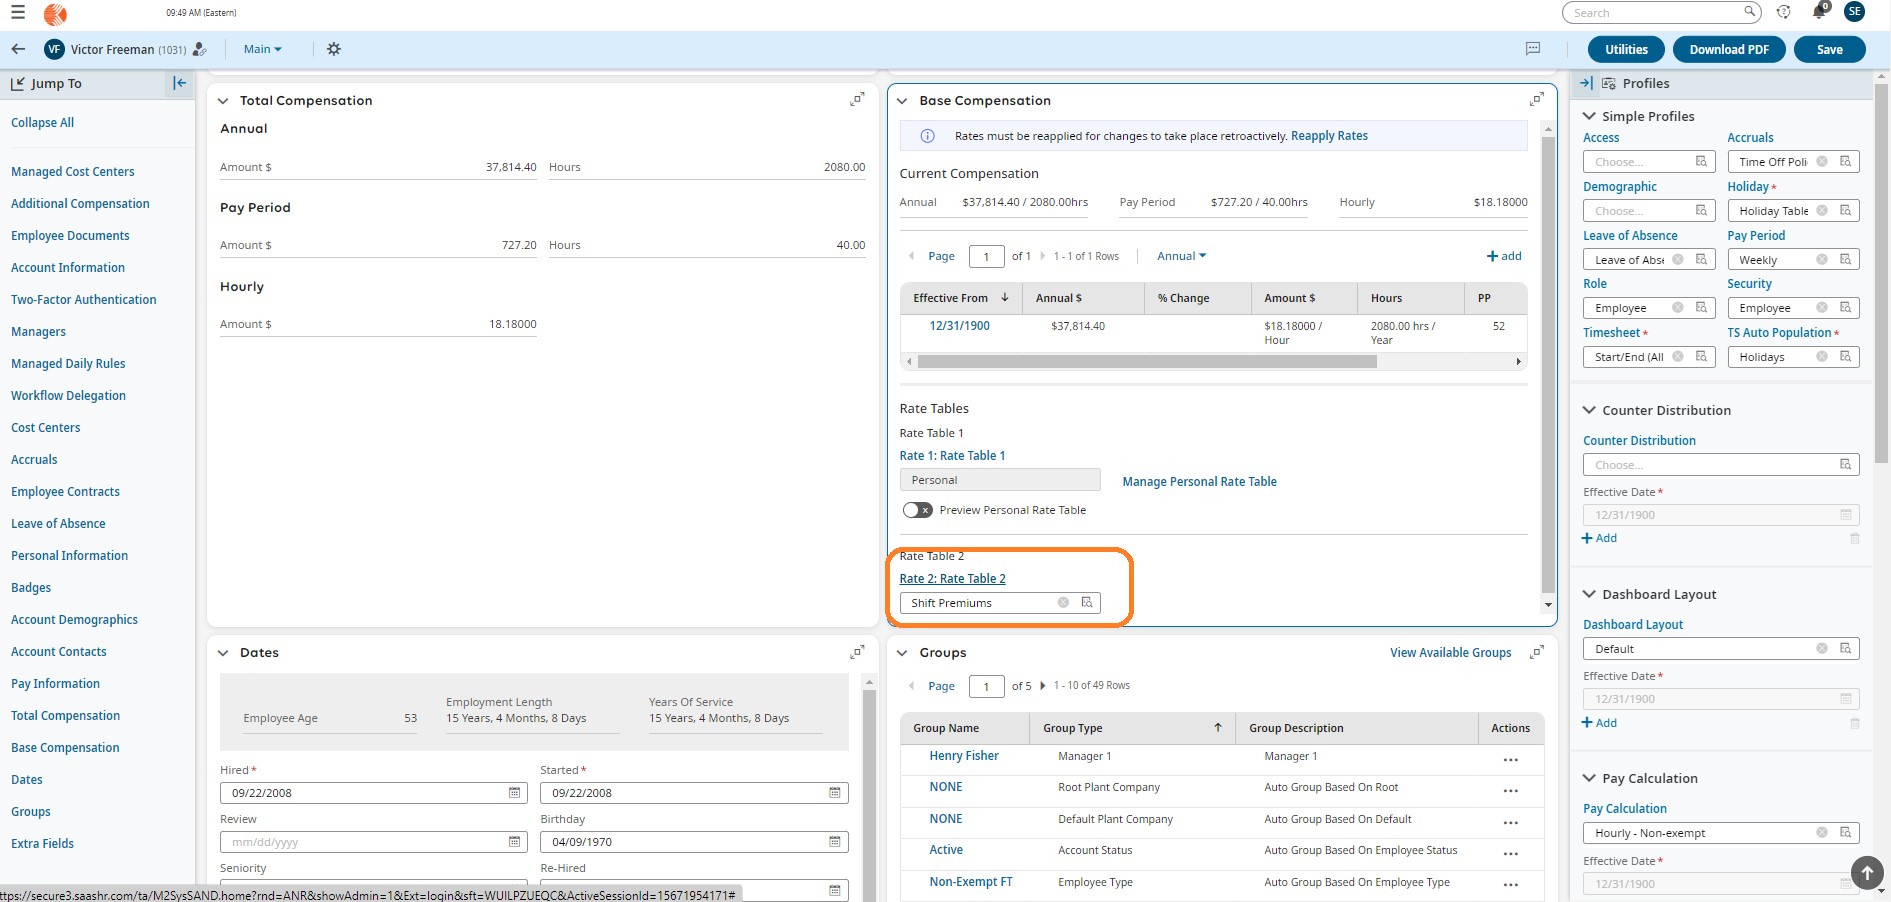
Associate with Rate Table:
- Determine if a “Shift” Rate Table already exists.
- If yes, proceed to add the new premium to the existing table.
- If not, create a new Rate Table and assign it to relevant employees.
Navigate to Rate Tables:
Head to Admin > Company Settings > Global Setup > Rate Tables.
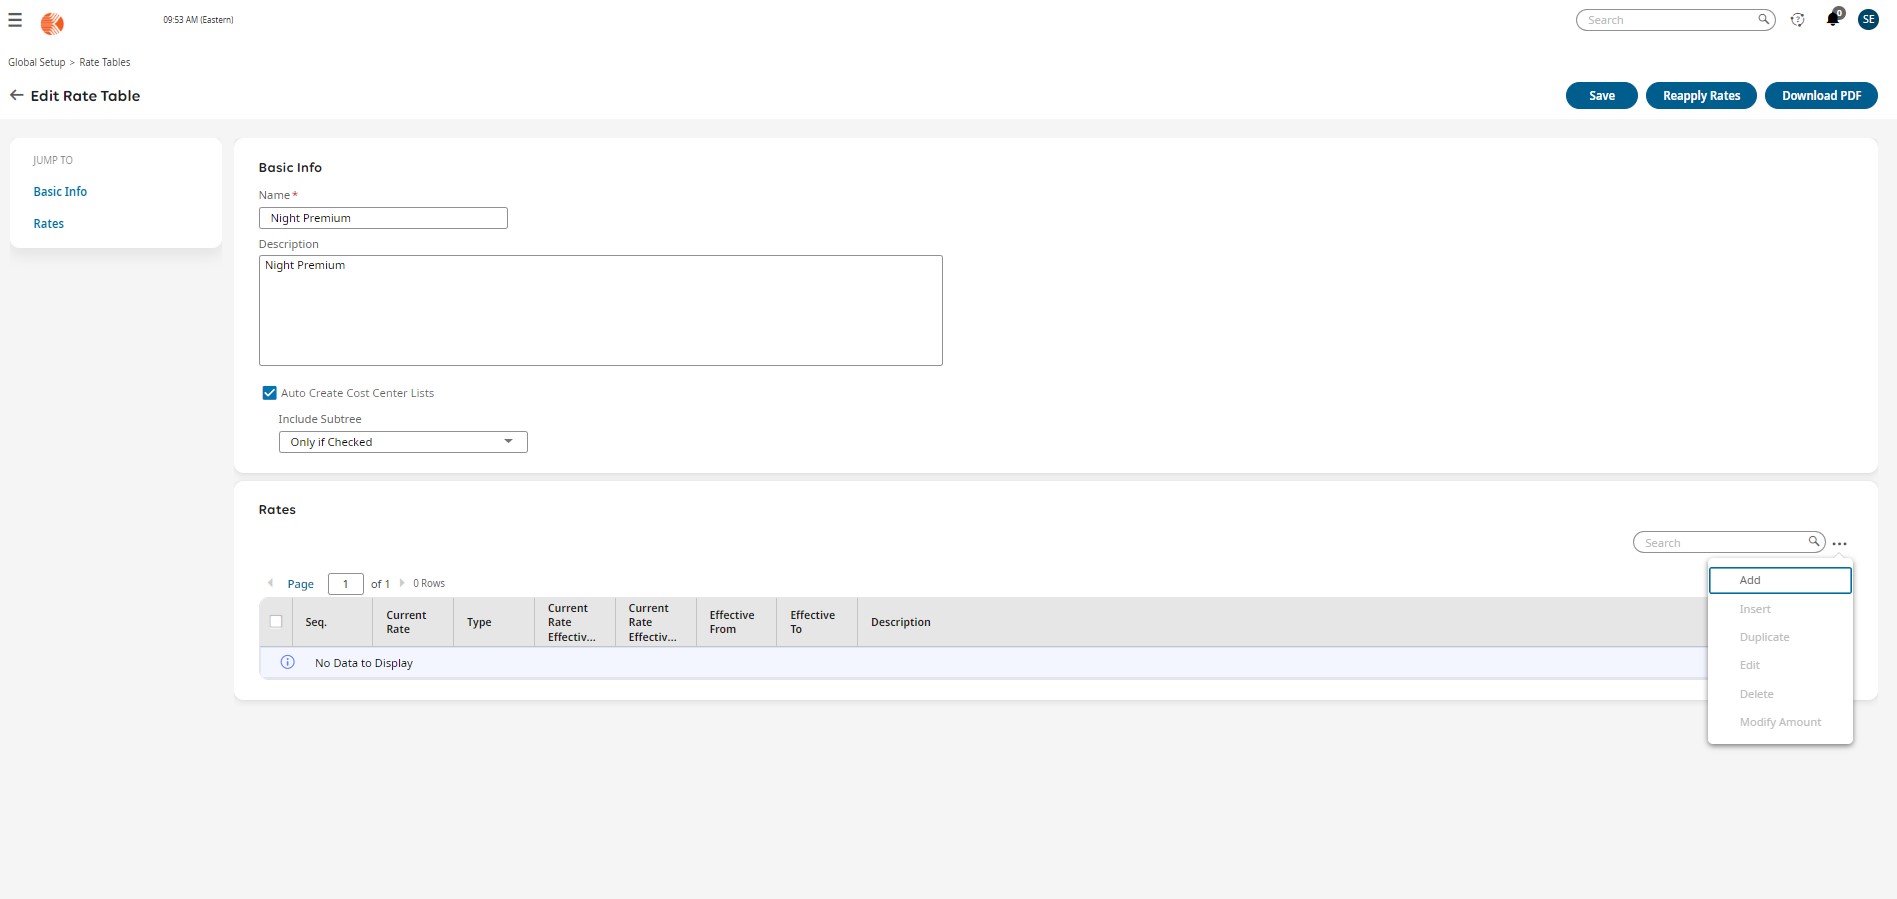
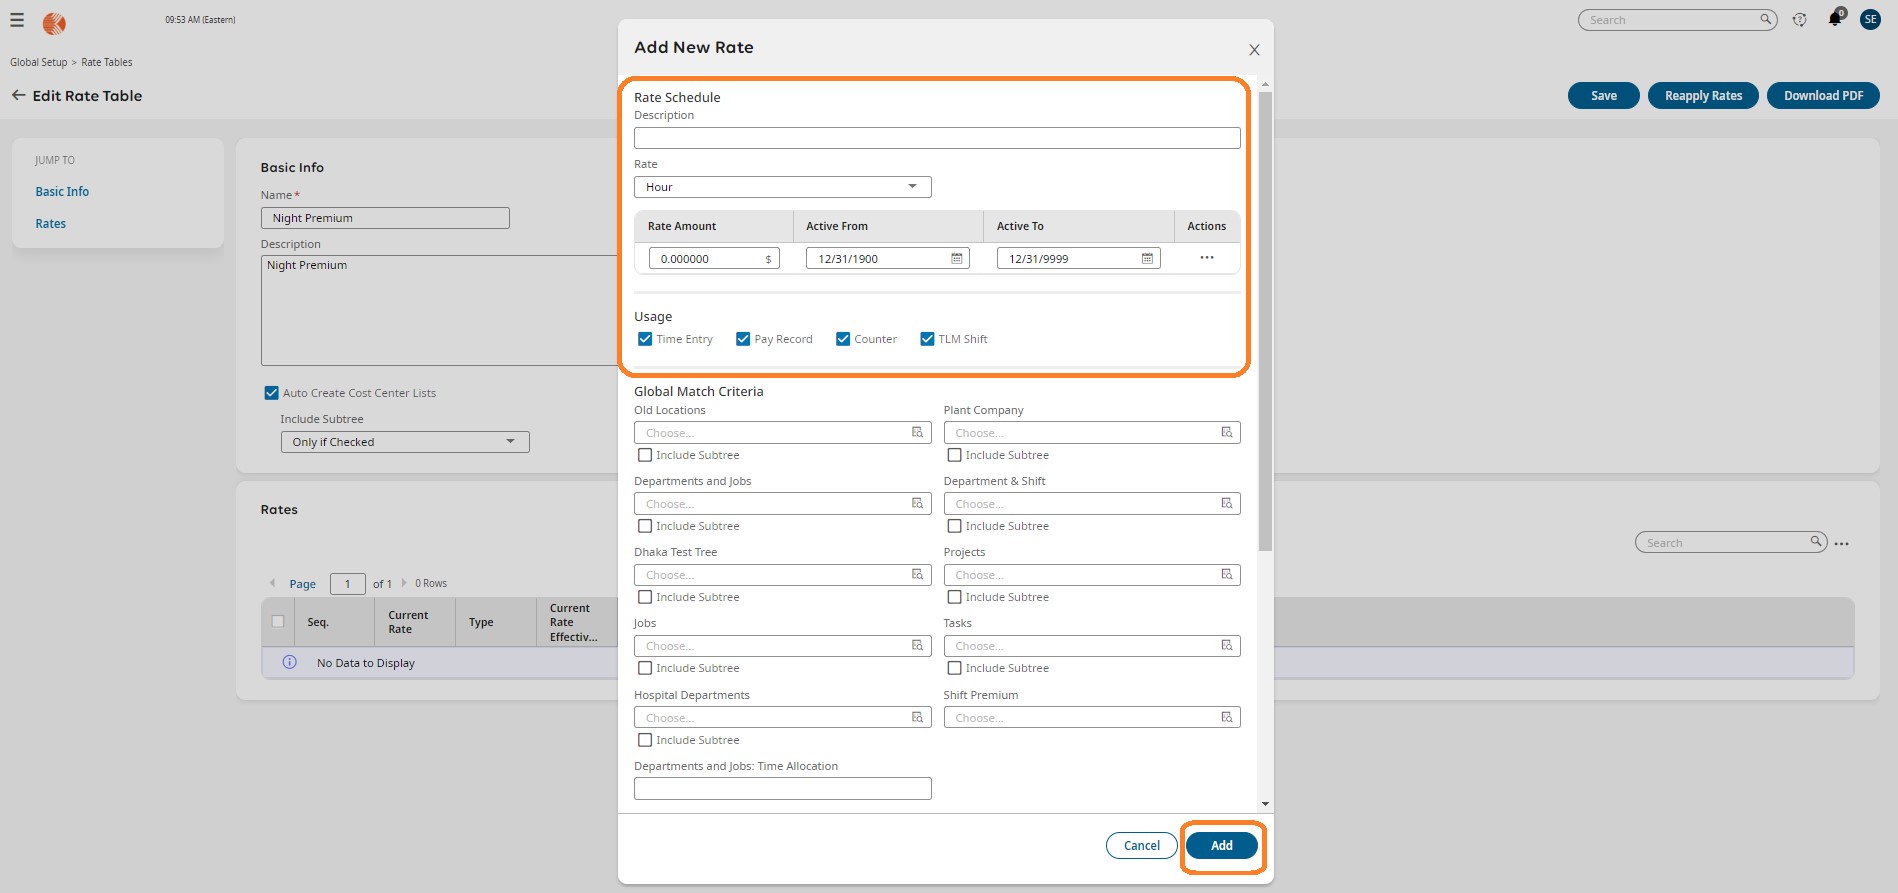
Add to Rate Table:
- If there’s an existing Rate Table for Shifts, follow these steps:
- Go to the current Rate Table.
- Click “Add” and provide a description (e.g., Night, Swing).
- Enter the applicable rate for the shift.
- Ensure to select the associated Shift Premium created earlier.
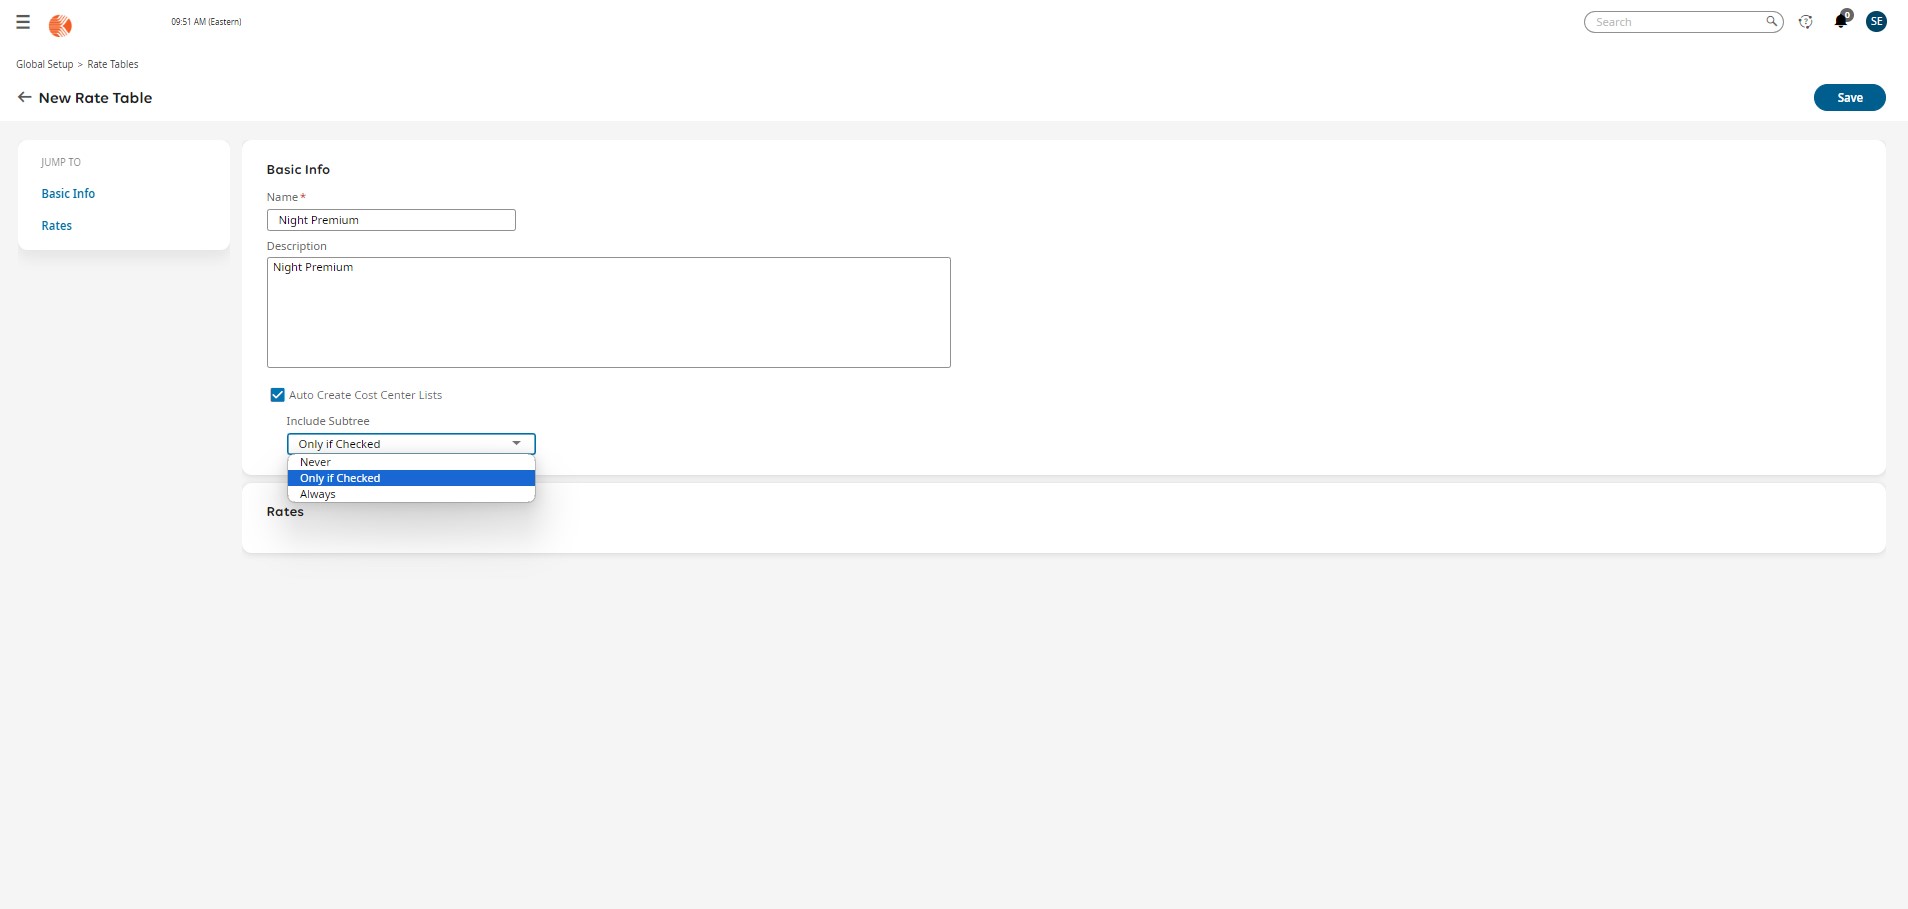
Creating a Brand New Rate Table
Initiate Rate Table Creation:
Click on “New Rate Table” within the Rate Tables section.
Fill in Details:
- Specify a name relevant to the type of rates (e.g., “Shifts” or “Shift Differentials”).
- Optionally, add a description for clarity.
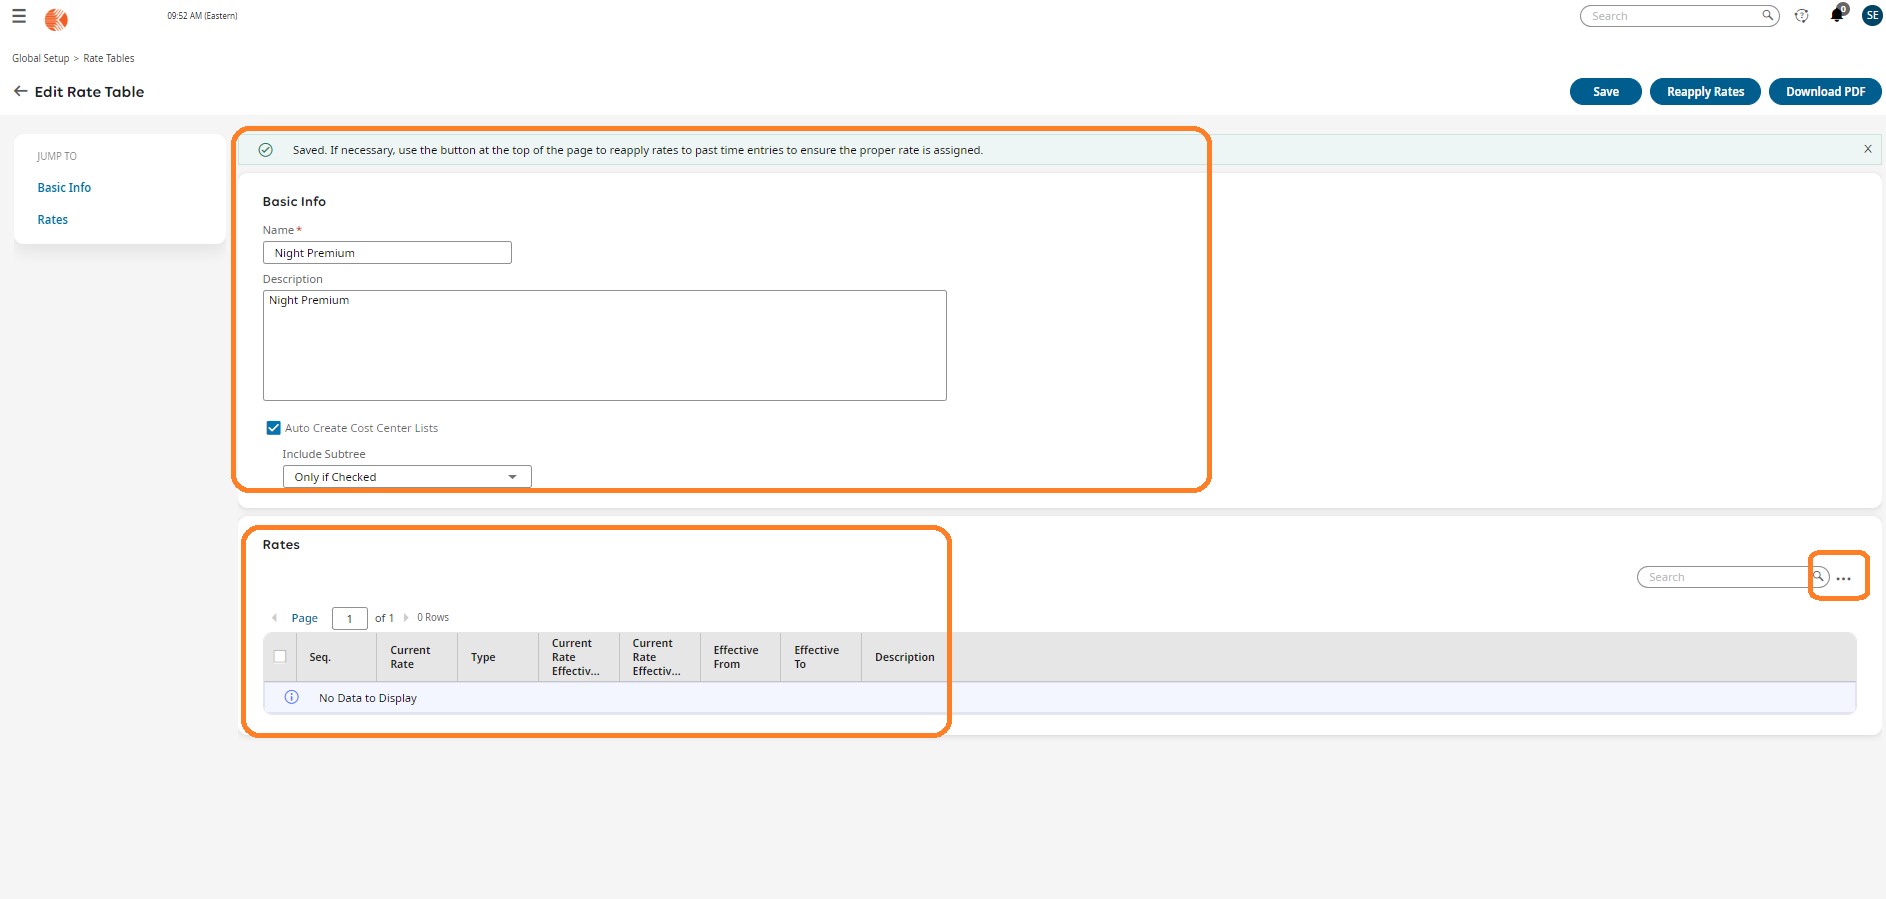
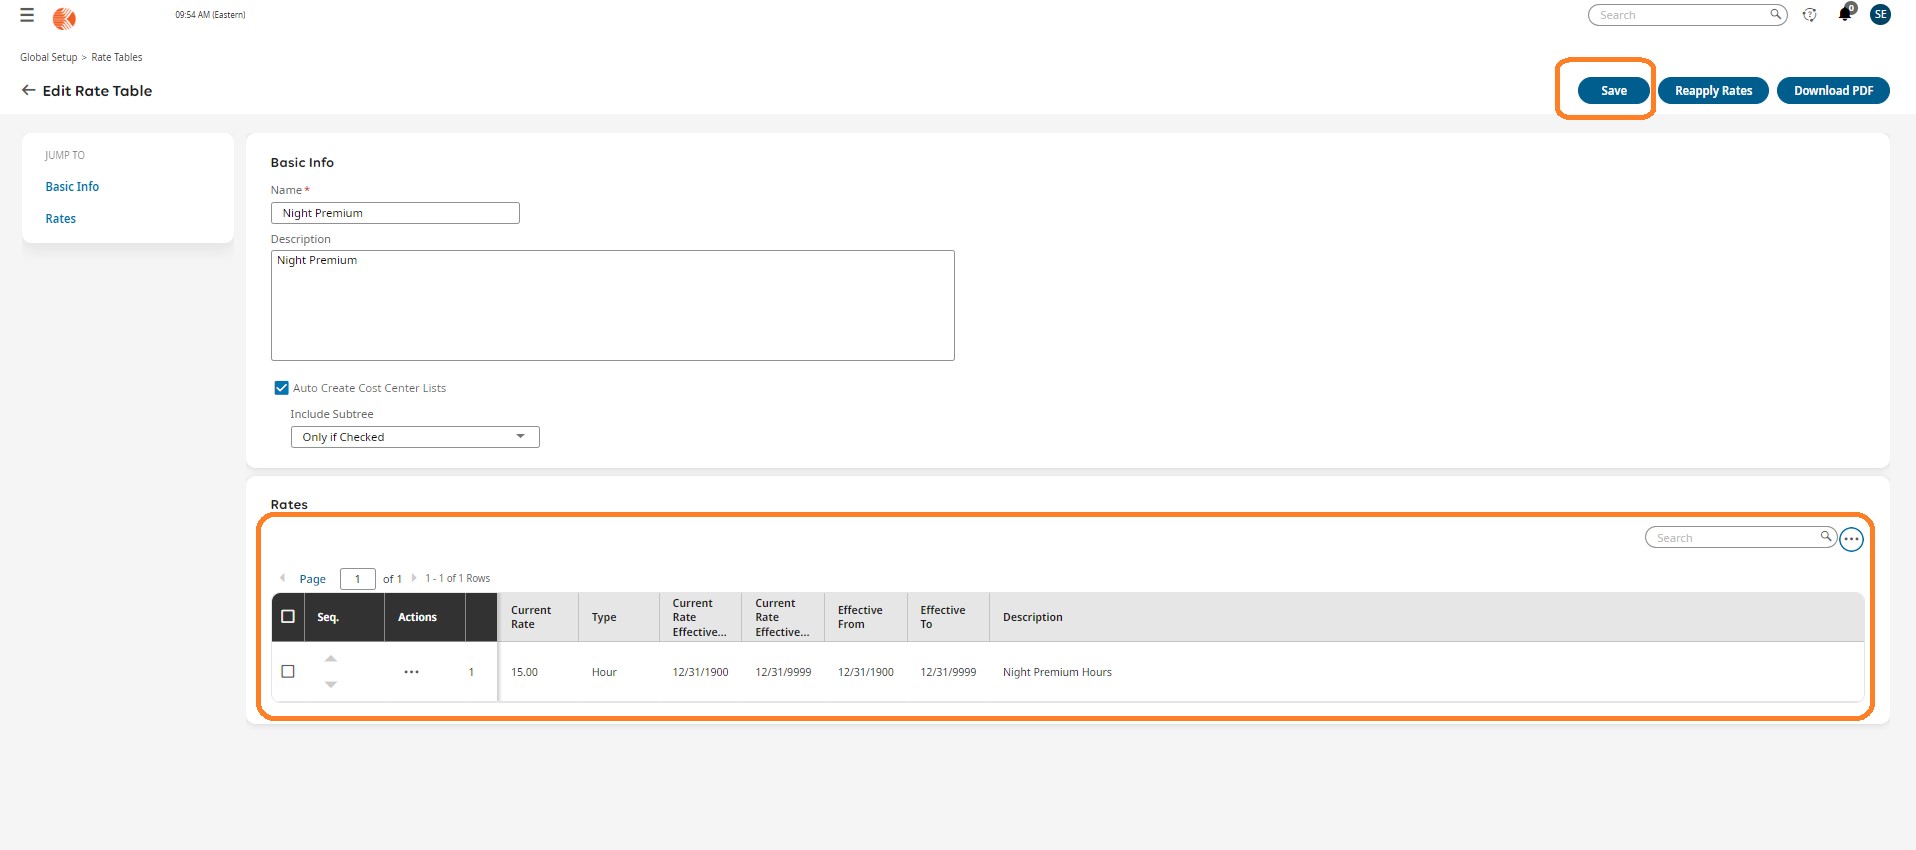
Save and Add Rates:
Click “Save” to create the new Rate Table.
Follow the previously outlined steps to input rates for various shifts.