Table of Contents
Ensuring a smooth user experience is crucial in program setup and modification. Embedded Content Custom Tiles are an excellent way to boost interaction on your platform. In this tutorial, we will show you how to make these tiles from scratch in Kronos/UKG Pro WFM.
Step 1: Go to Custom Tiles
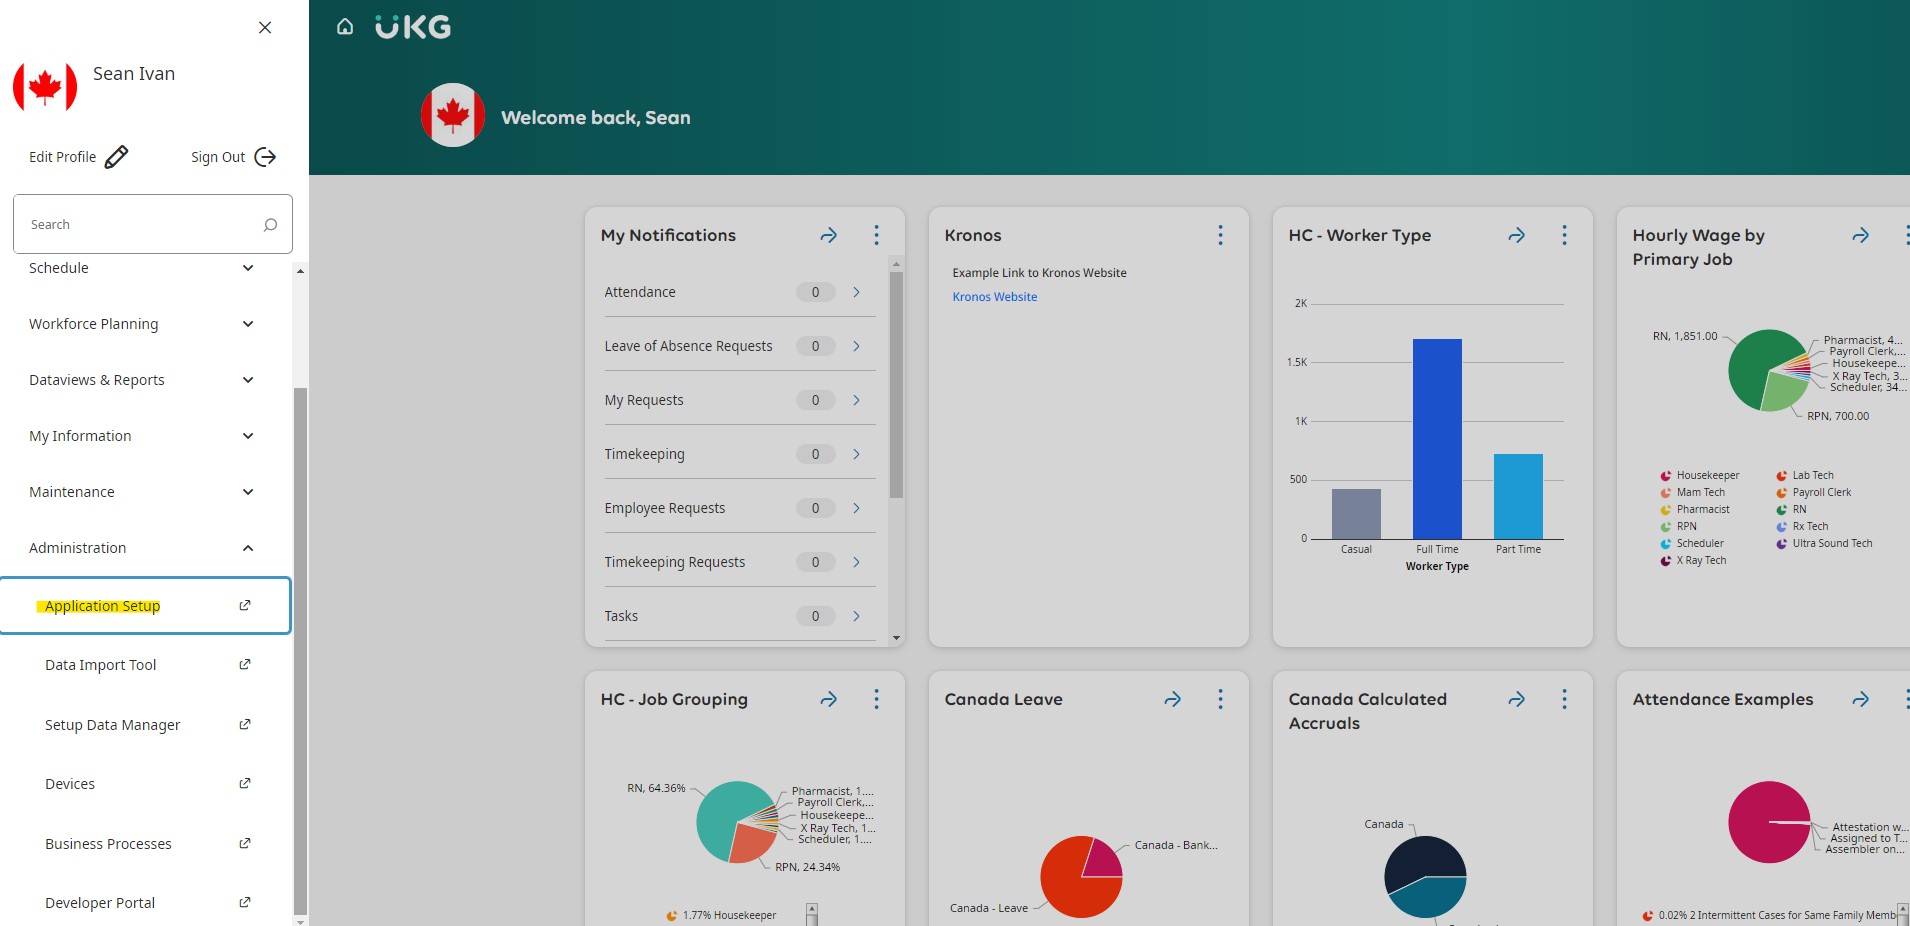
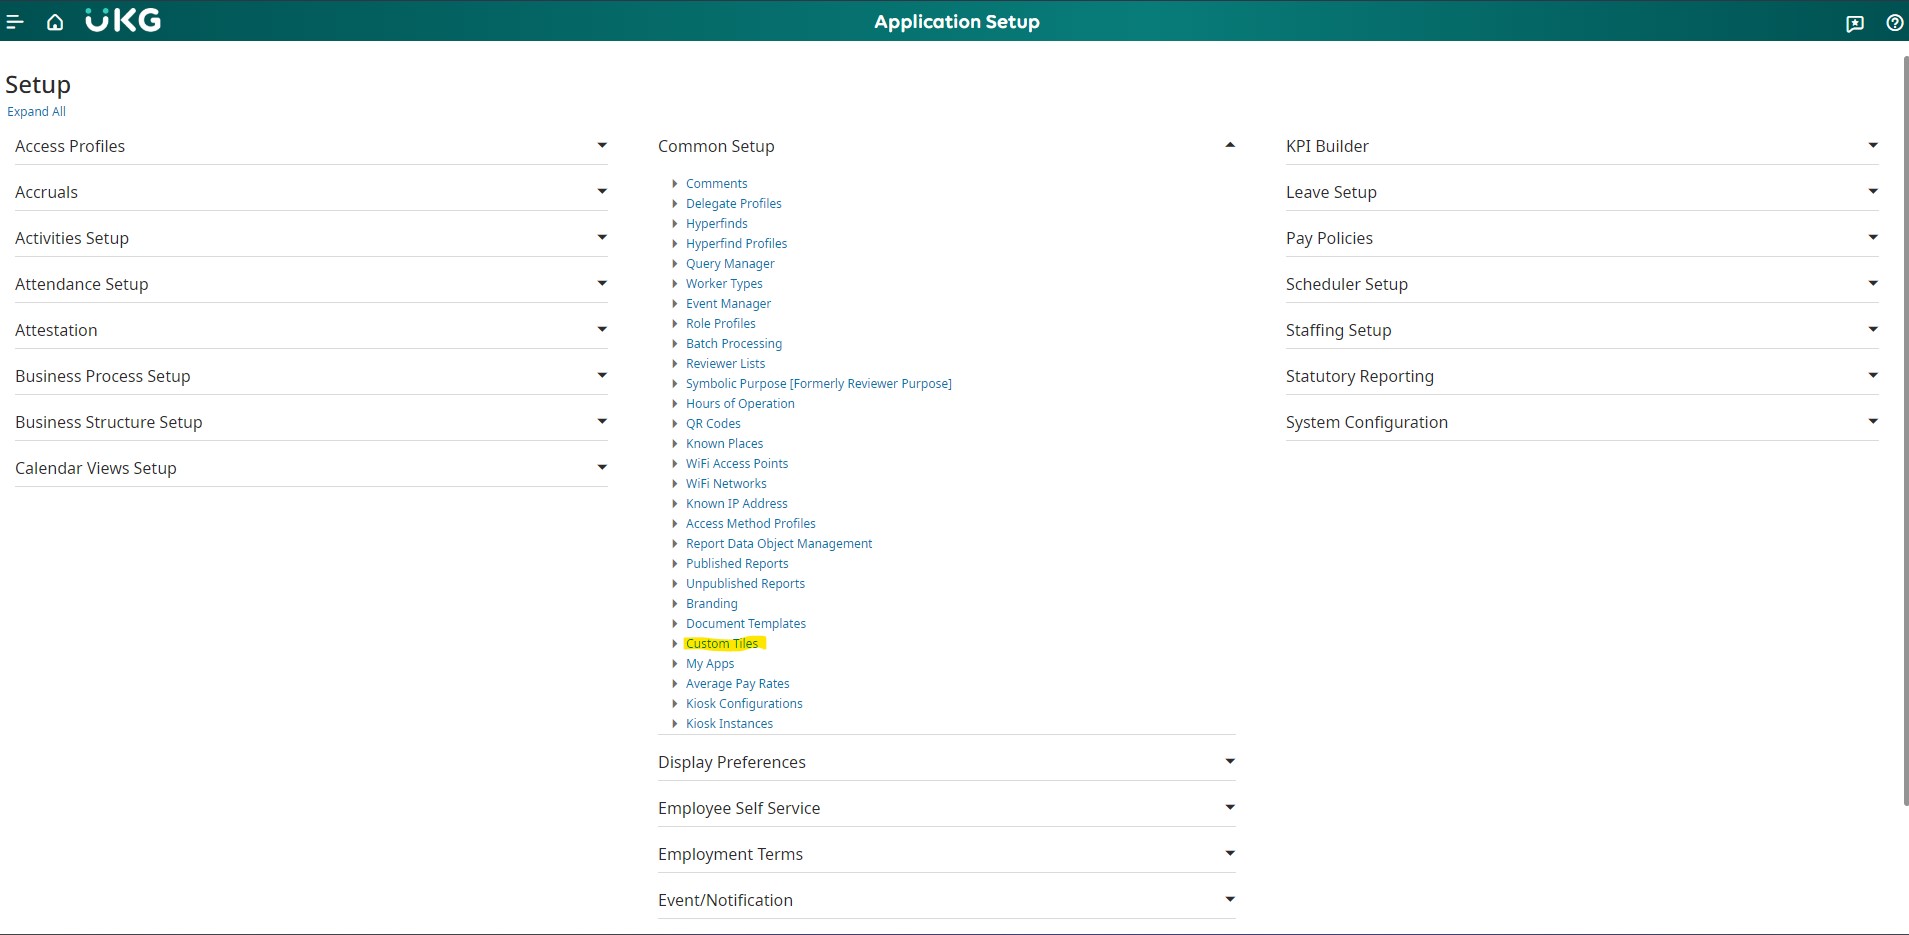
Start by selecting the Main Menu from the administration panel. From there, navigate to Administration > Application Setup > Common Setup > Custom Tiles.
Step 2: Create a New Tile
Once in the Custom Tiles section, select the “Create” button. This will start the process of creating an Embedded Content Custom Tile that is tailored to your platform’s requirements.
Step 3: Naming and Labeling
Enter a unique name in the fields provided for internal administration. The name will not be visible on the tile itself. Next, fill in the “Label” field with the text you would like to see at the top of the tile, making sure it conveys the purpose or content contained within.
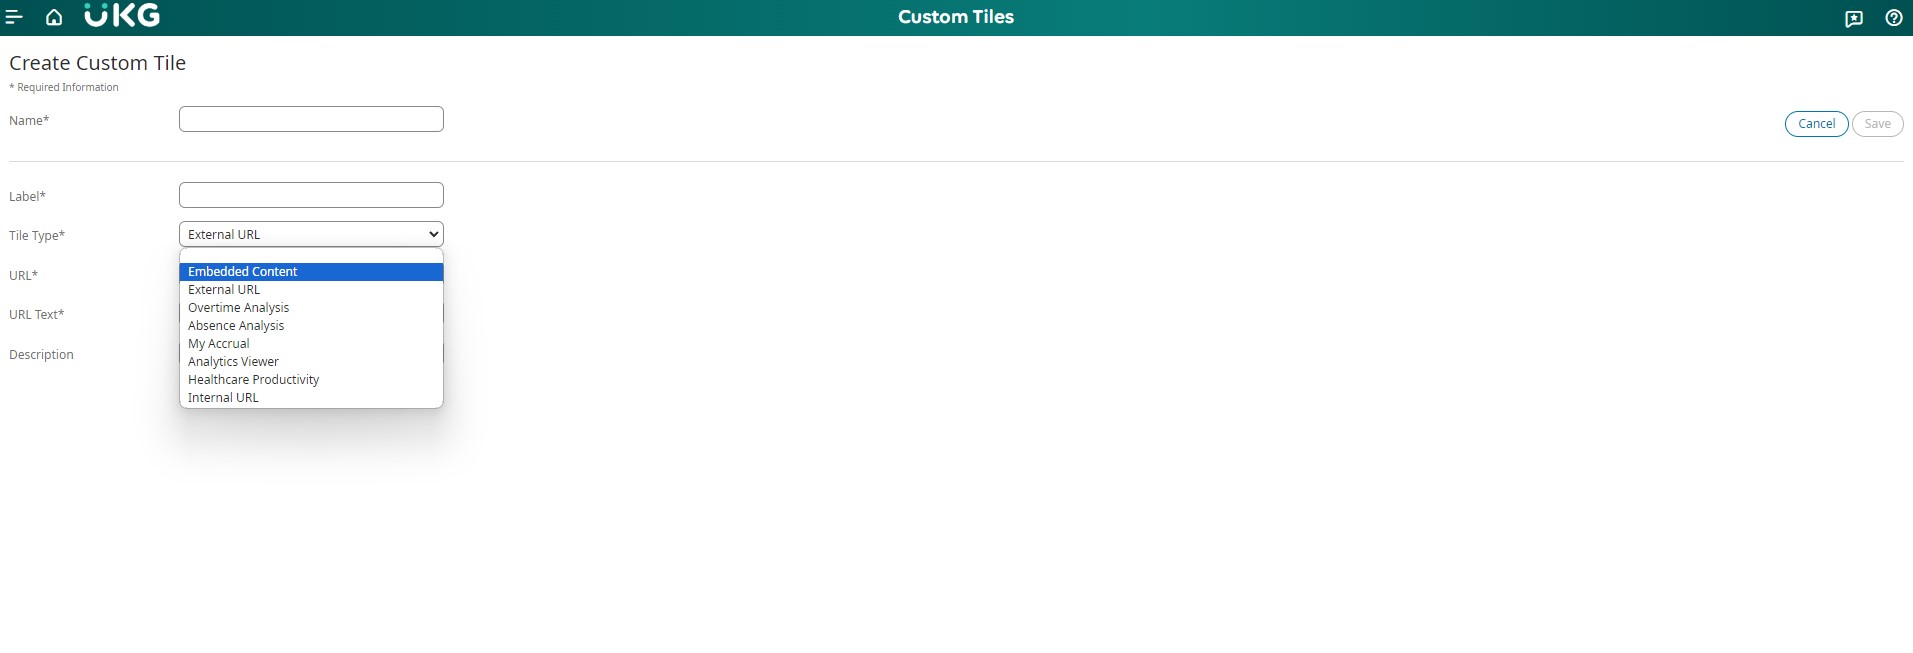
Step 4: Selecting the Tile Type
Choose “Embedded Content” as the tile type, indicating that this tile will include integrated content for an enhanced user experience.
Step 5: Icon and Content Provider
For now, leave the “Icon” and “Content Provider” fields empty. These elements are optional based on your specific design preferences and requirements.
Step 6: Provide the URL
Add the URL as a fully qualified domain name (FQDN) that points to the content. Make sure the URL uses HTTPS and is an absolute path. This stage is critical for creating a secure and direct connection to the embedded content.
Step 7: Configure Navigation (Optional)
If you want to include additional navigation information in the tile, enable the “Navigation” field. Select the appropriate “Navigation Type,” such as opening the content in a new tab or providing a link to it.
Caution: Avoid selecting “Pop Up” or “Slider” if you want a smoother user experience.
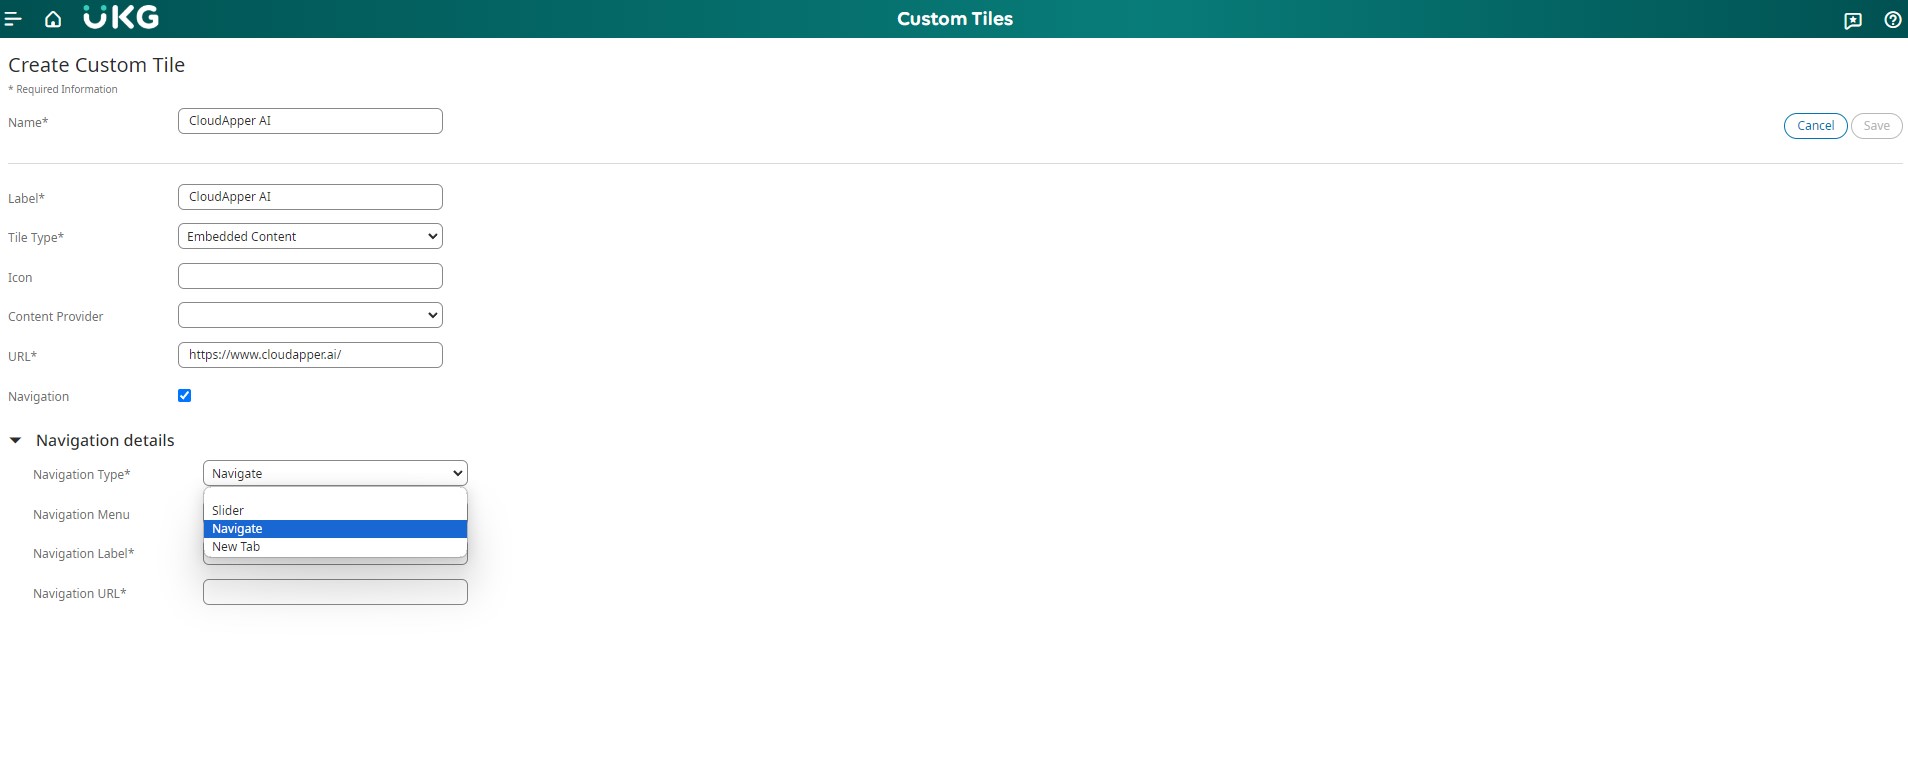
Step 8: Navigation Menu and Labels
If you’ve selected navigation, enter a label for the menu, tile, and URL. Maintain consistency and clarity to guide users smoothly.
Step 9: Save the Configuration
After you’ve finished the setup, click on “Save” to store your Embedded Content Custom Tile configuration. This ensures that your modifications are implemented and users are able to enjoy a more interactive experience on your platform.
Step 10: Accessing the Home Page Tiles
Begin by going to your home page. Locate and click on the Tile Library icon (a pencil) at the bottom of the screen. This will reveal the Tiles slider, which will allow you to create a more personalized and efficient workspace.
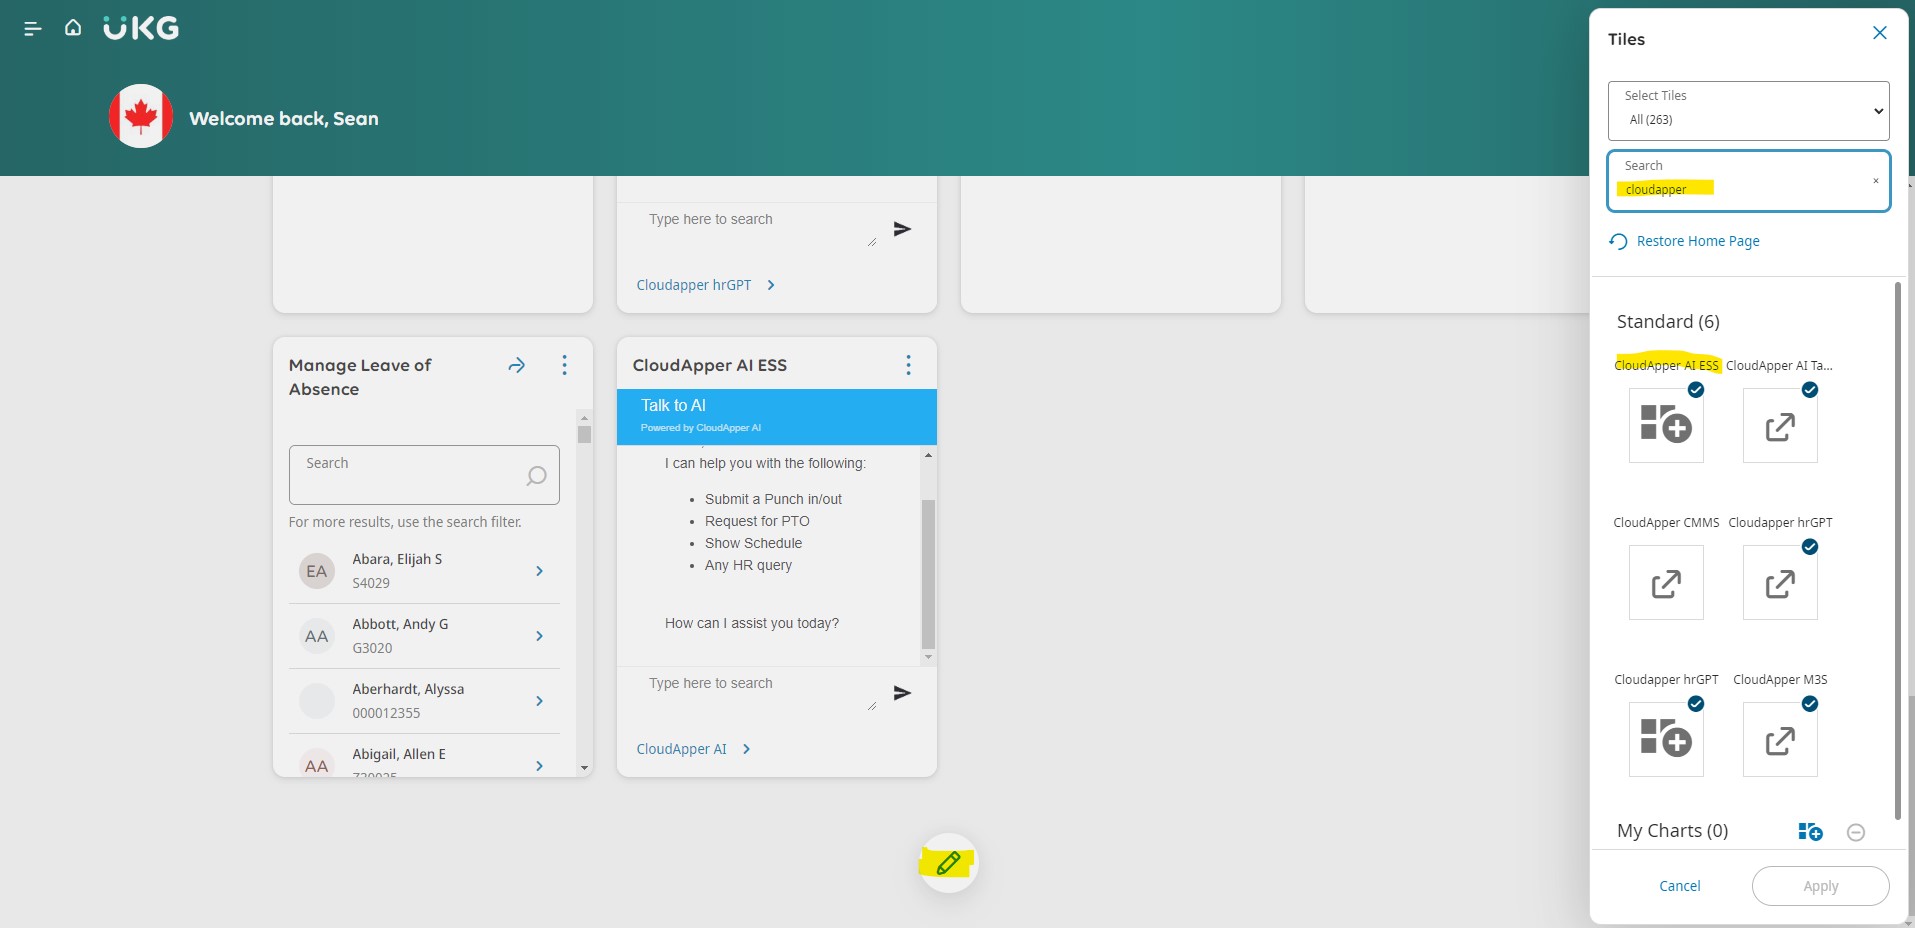
Step 11: Exploring Tile Options
The Tiles slider displays a plethora of options organized into categories. You can either select a tile category from the drop-down list or speed up the process by typing relevant keywords into the Search field. This ensures that you can easily find tiles that meet your specific requirements.
Step 12: Adding Tiles
Once you’ve found a tile that meets your needs, select it and then click “Apply.” This adds the selected tile to the home page and turns it into a visual representation of a common task or dynamic metric, such as a pie chart or graph. These tiles offer convenient shortcuts to frequently performed tasks or critical insights, converting your home page into a hub of efficiency.
Step 13: Managing Tile Display
Tiles that are currently visible on your home page are identifiable with a checkmark in the thumbnail. You can customize your workspace by adding, removing, refreshing, or relocating tiles as needed. This allows you to create a home page that perfectly aligns with your workflow and priorities.
Conclusion
By integrating Embedded Content Custom Tiles into your application, you are not only personalizing the interface; you are also improving the user experience. This helps you create a dynamic and engaging environment that boosts user satisfaction and retention.